On this page I demonstrate how to construct a field of stars which should provide a suitable backdrop for other cosmic critters such as planets or nebulae. The techniques discussed below are adapted from a selection of online tutorials listed here.
TECHNICAL DETAILS: GIMP 2.10.18 on Ubuntu 20.04.2 1.7.0 LTS (July 2021)
TIP: Don’t be afraid to experiment with different settings in the windows and dialog boxes below. You can usually reverse a command by going to the Edit menu and selecting the Undo option.
TIP: Pay attention to which layer is currently active!
1. New image
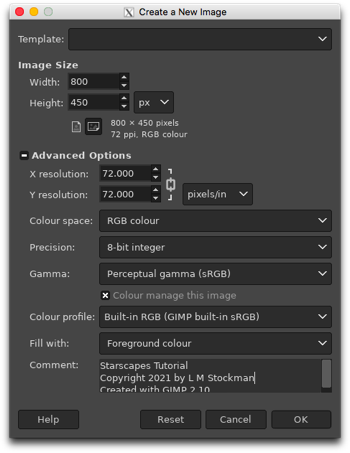
We begin by starting up GIMP and creating a new file. There are a variety of templates that you can use or you can just input your own dimensions and resolution. For instance, I have chosen a Width of 800 pixels and a Height of 450 pixels to give a 16:9 aspect ratio, plus a 72 pixels/inch Resolution since I don’t need high-definition. Most of the Advanced Options you can leave alone but make sure that you are working in the RGB Colour Space. Black is my default foreground colour so I have chosen to Fill my new image with that. The Comment section is for you to add whatever text you wish to have associated with your new file: image title, your name, copyright date, description, whatever. Press [OK] when you are happy with your choices and a new image will appear.
If your new image does not have a black background, then it is time to break out your Toolbox. In the Toolbox window, make black your foreground colour. Then use the Bucket Fill tool to fill in your image with the colour black.
2. Background stars
2.1 CIE lch Noise
LAYER: Background
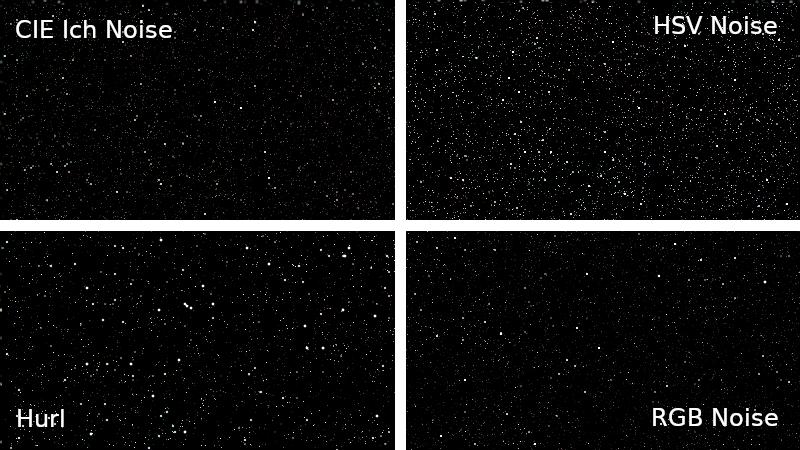
Any of the CIE lch Noise, HSV Noise, Hurl or RGB Noise filters may be used to create a field of random dots (see section 6). Here I demonstrate the use of the CIE lch Noise filter.
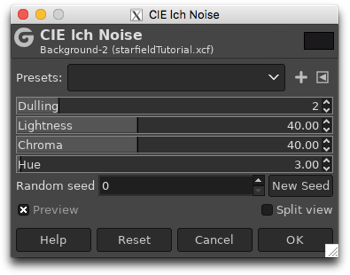
Image: Filters → Noise → CIE lch Noise
In the dialog box, there are a number of options. Make sure that the Preview box is checked and try altering the various values to see their effect on your image. I have simply used the defaults. Press [OK] when you are finished. The result is a black layer thickly covered in coloured dots.
2.2 Desaturate
LAYER: Background
Change the coloured dots to white dots by desaturating them.
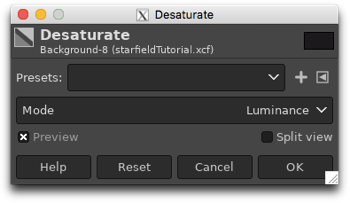
Image: Colours → Desaturate → Desaturate
In the dialog box, there are several different modes for desaturating the image. I have simply used the default. Press [OK] when you are finished. The result is a black layer thickly covered in white dots.
2.3 Colour Levels
LAYER: Background
The dots need to be thinned out. Adjust the colour levels to reduce the number of white dots.
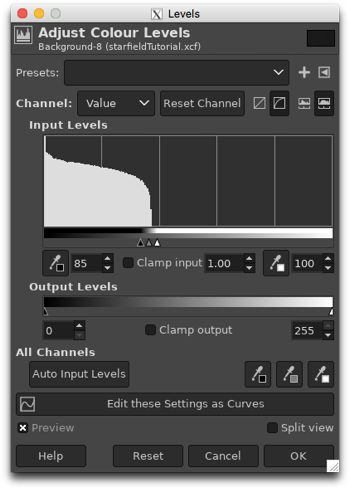
Image: Colours → Levels
In the dialog box, there are a number of options, but the most important ones are the Input Levels. The black triangle slider (first text box) determines the black point. All values below this are converted to black. Permitted values range from 0 to the white point. The white triangle slider (third text box) determines the white point. All values above this are converted to white. Permitted values range from the black point to 255. The grey triangle slider (second text box) controls the grey point. Make sure that the Preview box is checked, then decrease the white point and increase the black point to thin out the dots to the desired density. Press [OK] when you are finished. The result is a black layer sparsely covered with small grey and white dots of varying brightness.
NOTE: There are four buttons following the Channel options. The first two switch between linear and perceptual (non-linear) modes and the last two switch between linear and logarithmic histograms in the Input Levels. I usually use perceptual mode and logarithmic histograms.
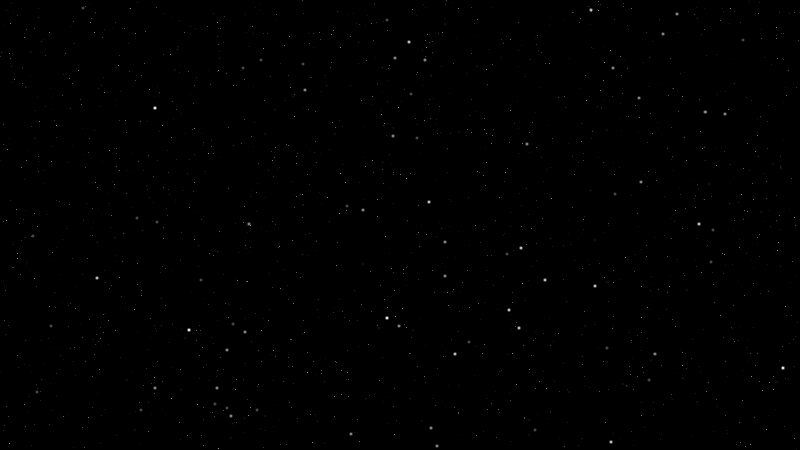
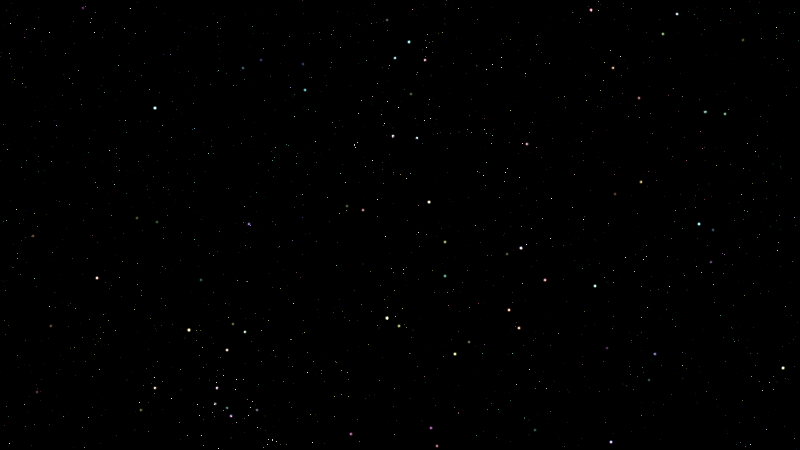
2.4 Result

3. Bright stars
3.1 Duplicate Layer
LAYER: Background
So far we have a nice background of small dots of varying brightnesses (albeit all fairly faint). However, we may wish to add a sprinkling of larger, brighter dots. We can accomplish this by first duplicating the background layer.
Image: Layer → Duplicate Layer
Rename the duplicate layer ‘Bright Stars’. You rename a layer by double clicking the name in the Layers window and typing in the new name, then pressing the <enter> key.
3.2 Scale Layer
LAYER: Bright Stars
To increase the size of the white dots, increase the size of the layer.
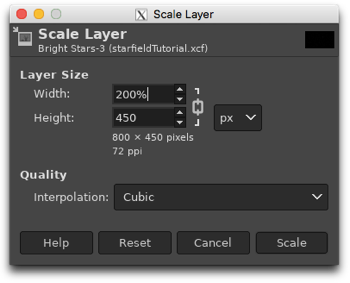
Image: Layer → Scale Layer
I have doubled the size of the layer by typing 200% in the Width box (you can use the Height box instead if you wish) and pressing the <enter> key. Alternatively, just type in the desired width or height and press the <enter> key. (Make sure the ‘chain’ to the right of the width and height boxes is not broken so that the layer will scale equally in both width and height.) Press [SCALE] when you are finished. The result is a black layer covered with larger, rather blurry grey and white dots.
3.3 Colour Levels
See section 2.3 for more details.
LAYER: Bright Stars
We only want a few bright stars so we must thin these out.
Image: Colours → Levels
In the Input Levels, adjust the black point and white points to get the number of stars that you want. The result is a black layer sparsely covered with large grey and white dots.
3.4 Gaussian Blur
LAYER: Bright Stars
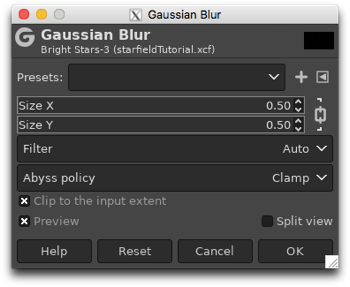
If the large dots look a little too sharp and square, blur them by a small amount to soften their appearance. This is achieved by using the Gaussian Blur filter.
Image: Filters → Blur → Gaussian Blur
Make sure that the Preview box is checked and try assorted values for the Size of the blur to get the desired result. Press [OK] when you are finished.
3.5 Rotate
LAYER: Bright Stars
Since the Bright Stars layer is nothing more than a scaled-up version of the Background layer, we need to rotate the Bright Stars layer by 180° to make the placement of bright stars look random and unconnected to the faint background stars (which we cannot see at the moment).
Image: Layer → Transform → Rotate 180°
3.6 Mode
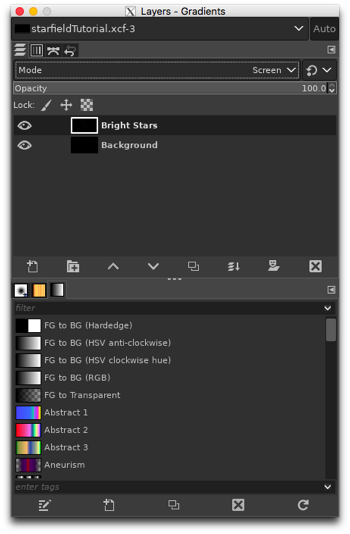
LAYER: Bright Stars
The Bright Stars layer is opaque and completely obscures the underlying Background layer. In the Layers window, change the Mode from Normal to Screen. This allows the Background layer of small white and grey dots to shine through the upper Bright Stars layer of large white dots.
3.7 Result
The final result looks much like the original star field but with a sprinkling of slightly brighter stars.
4. [optional] Adding colour
Stars are not actually white but exhibit a range of subtle colours, ranging from the hot blue-white stars through to the warm yellow stars and on to the cool red stars. If you think that the white stars are a bit too cold and harsh, we can enliven the scene with a hint of stellar colour.
4.1 New Layer
LAYER: Bright Stars
Add a white layer above the Bright Stars layer.
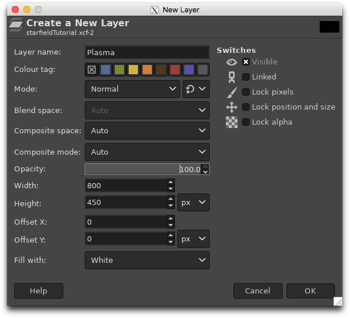
Image: Layer → New Layer
Name the layer ‘Plasma’ and choose white as the Fill with colour. Press [OK] when you are finished.
4.2 Plasma
LAYER: Plasma
We will add random blobs of colour to this layer by using the Plasma filter.
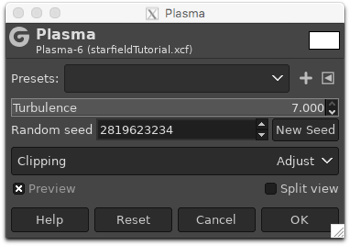
Image: Filters → Render → Noise → Plasma
There are a number of options in the dialog box. The Turbulence controls how chaotic the colours are: the lower the number, the smoother the colours. The Random Seed changes the arrangement of the colours. After making sure that the Preview box is checked, set the Turbulence to a number greater than 1.0 and press the New Seed button until you get a pleasing array of colours. These are going to be the colours of the stars so you may wish to avoid any combinations with a lot of green in them. When you get something that you like, press [OK].
4.3 Mode
See section 3.6 for more details.
LAYER: Plasma
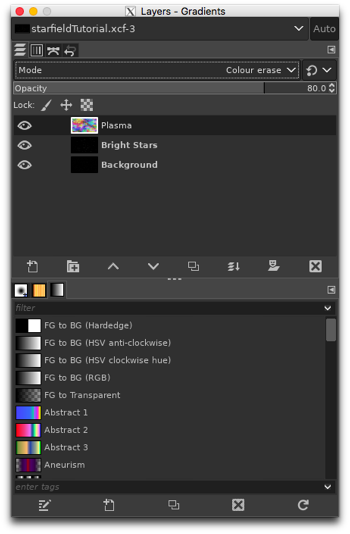
At the moment, we have a colourful layer that is blocking out all of our stars. To apply the colour to the stars, change the Mode of the Plasma layer from Normal to Colour Erase. A similar effect can be obtained with Burn, Darken Only, Dodge or Multiply. You should end up with a black background with coloured stars.
4.4 Opacity
LAYER: Plasma
If the colours are too strong, reduce the opacity of the Plasma layer until you get an effect that you like. Go to the Layers window; you will find the Opacity slider just below the Mode. The lower the value, the more transparent the layer. Since the Plasma layer sits on a white background, the colours will become more muted as you decrease the opacity.
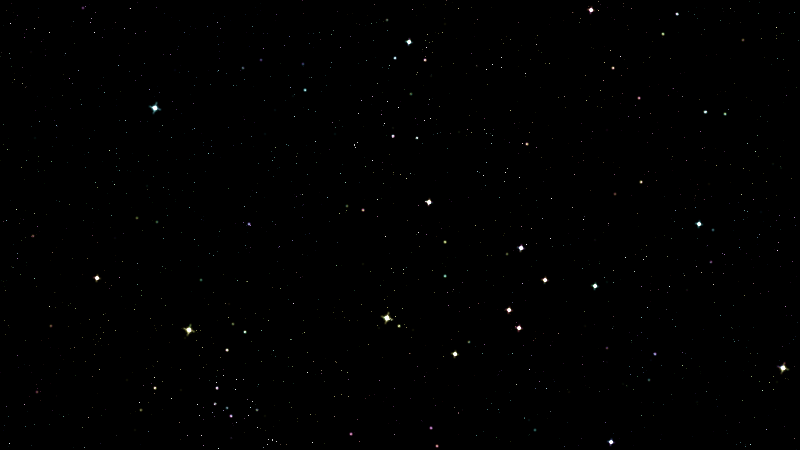
4.5 Result
5. [optional] Adding sparkle
5.1 Sparkle
LAYER: Bright Stars
To add a subtle twinkling effect, use the Sparkle filter.
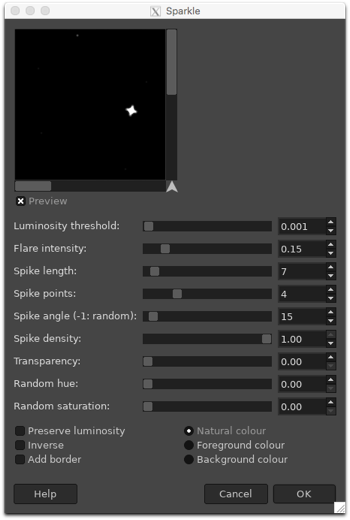
Image: Filters → Light and Shadow → Sparkle
In the dialog box, there are a number of options available. The most relevant ones are Flare intensity and Spike length. Try different combinations until you like what you see and then press [OK] when you are finished.
5.2 Result
6. Other noise filters
As mentioned in section 2.1, there are several different filters which can be used to create a random smattering of stars. All four filters give similar results so use your favourite.