On this page I demonstrate four ways to construct a nebula, a collection of interstellar gas and dust. Generally speaking, there are three types of nebulae:
- emission nebulae: These are formed from ionised gas, typically excited by a nearby hot star. They are often red in colour but can also appear green or blue.
- reflection nebulae: These clouds of dust do not glow on their own but shine by the reflected light of nearby stars. They are usually blue in colour.
- dark nebulae: These dust clouds are dense enough to obscure visible wavelengths and appear as dark ribbons silhouetted against the sky.
Supernova remnants and planetary nebulae are special cases of emission nebulae.
The techniques discussed below are adapted from a selection of online tutorials listed here.
TECHNICAL DETAILS: GIMP 2.10.18 on Ubuntu 20.04.2 1.7.0 LTS (July 2021)
TIP: Don’t be afraid to experiment with different settings in the windows and dialog boxes below. You can usually reverse a command by going to the Edit menu and selecting the Undo option.
TIP: Pay attention to which layer is currently active!
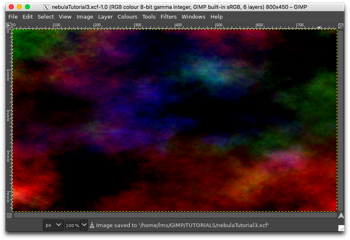
1. Preliminaries
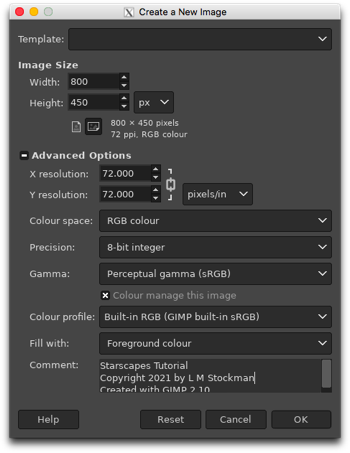
We begin by starting up GIMP and creating a new file. There are a variety of templates that you can use or you can just input your own dimensions and resolution. For instance, I have chosen a Width of 800 pixels and a Height of 450 pixels to give a 16:9 aspect ratio, plus a 72 pixels/inch Resolution since I don’t need high-definition. Most of the Advanced Options you can leave alone but make sure that you are working in the RGB Colour Space. Black is my default foreground colour so I have chosen to Fill my new image with that. The Comment section is for you to add whatever text you wish to have associated with your new file: image title, your name, copyright date, description, whatever. Press [OK] when you are happy with your choices and a new image will appear.
If your new image does not have a black background, then it is time to break out your Toolbox. In the Toolbox window, make black your foreground colour. Then use the Bucket Fill tool to fill in your image with the colour black.
Finally, make a basic star field containing stars of varying brightnesses.
Now we are ready to create our nebula. Which technique will you choose?
- Technique #1: Simple single-colour nebula
- Technique #2: Simple multi-colour nebula
- Technique #3: Vivid multi-colour nebula
- Technique #4: Star cloud
2. Technique #1: Simple single-colour nebula
This simple nebula relies on the Solid Noise filter, after which we adjust the Colour Levels, add a little bit of Blur, and Colourise the result.
2.1 New Layer
LAYER: Topmost layer
We need to add a new layer to the top of the stack.
Image: Layer → New Layer
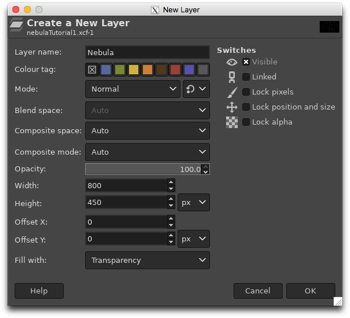
Name the layer ‘Nebula’ and choose Transparency as the Fill with colour. Press [OK] when you are finished.
2.2 Solid Noise
LAYER: Nebula
We will add random monotone blobs to our layer using the Solid Noise filter.
Image: Filters → Render → Solid Noise
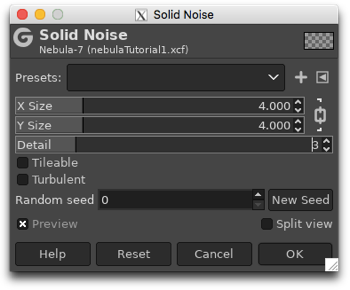
There are a number of options in the dialog box, including the X/Y Size (the relative size of the blobs), Detail (how much fine detail there is within a blob) and Seed (for randomisation). Choose values for the Size and Detail and press the Seed button until you get a pattern that you like. Press [OK] when you are finished.
2.3 Colour Levels
LAYER: Nebula
We now adjust the Colour Levels to increase contrast and get a pleasing shape for our nebula.
Image: Colours → Levels
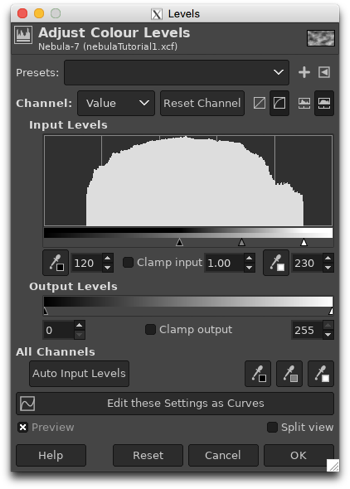
In the dialog box, there are a number of options, but for this step, the most important ones are the Channel and the Input Levels. The Channel should be set to Value. Under Input Levels, there are three triangle sliders/text boxes. The black triangle slider (first text box) determines the black point. All values below this are converted to black. Permitted values range from 0 to the white point. The white triangle slider (third text box) determines the white point. All values above this are converted to white. Permitted values range from the black point to 255. The grey triangle slider (second text box) controls the grey point. Make sure that the Preview box is checked, then decrease the white point and increase the black point to get the desired shape. Press [OK] when you are finished.
NOTE: There are four buttons following the Channel options. The first two switch between linear and perceptual (non-linear) modes and the last two switch between linear and logarithmic histograms in the Input Levels. I usually use perceptual mode and logarithmic histograms.
2.4 Duplicate layer
LAYER: Nebula
Make a duplicate of the Nebula layer.
Image: Layer → Duplicate Layer
There is no need to rename the layer. It will appear as Nebula copy.
2.5 Mode
LAYER: Nebula copy
Set the layer Mode to Addition. We now have two copies of the nebula.
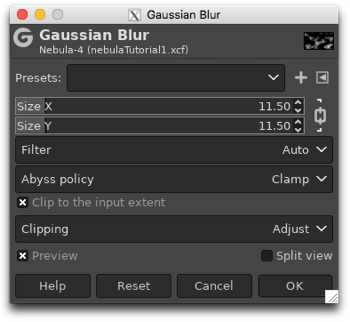
2.6 Gaussian Blur
LAYER: Nebula
The edges of the nebula are too sharp so we will blur them to soften their appearance. This is achieved by using the Gaussian Blur filter on the original Nebula layer.
Image: Filters → Blur → Gaussian Blur
Make sure that the Preview box is checked and try assorted values for the Size of the blur to get the desired result. Press [OK] when you are finished.
2.7 Merge
LAYER: Nebula copy
The copy of the nebula retains all of its sharp features whilst the original nebula is much softer in appearance, particularly around the edges. We will merge the copy down onto the original for the final version of the nebula.
Image: Layers → Merge Down
We now have just one nebula layer, called Nebula.
2.8 Colourise

LAYER: Nebula
At the moment, the nebula is varying shades of grey. We will emulate a reflection nebula and turn the clouds blue. You are free, of course, to choose whatever colour you like.
Image: Colours → Colourise
Make sure that the Preview box is checked, then adjust the Hue, Saturation and Lightness to the desired colour. (You can also choose the colour by clicking on the colour box.) Press [OK] when you are finished.
2.9 Mode
LAYER: Nebula
Change the layer Mode to Screen. The underlying stars now appear through the nebula.
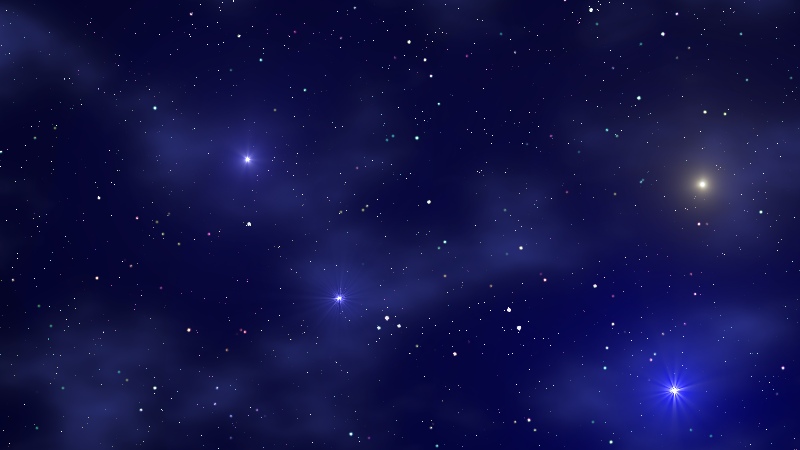
2.10 Result
After adding a few decorative supernovae (see section 6), we get the following scene:
3. Technique #2: Simple multi-colour nebula
This faint background nebula calls upon the Plasma filter, some colour correction and Blur, and a bit of opacity trickery.
3.1 Add layer
LAYER: Topmost layer
We need to add a new layer to the top of the stack.
Image: Layer → New Layer
Name the layer ‘Nebula’ and choose Transparency as the Fill with colour. Press [OK] when you are finished.
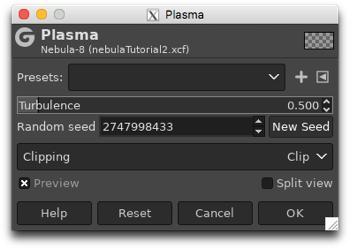
3.2 Plasma
LAYER: Nebula
We will add random blobs of colour to this layer by using the Plasma filter.
Image: Filters → Render → Noise → Plasma
There are a number of options in the dialog box. The Turbulence controls how chaotic the colours are: the lower the number, the smoother the colours. The Random Seed changes the arrangement of the colours. After making sure that the Preview box is checked, choose a Turbulence value and press the New Seed button until you get a pleasing combination of colours. These are going to be the colours of your nebula. When you get something that you like, press [OK].
3.3 [optional] Colour correction
LAYER: Nebula
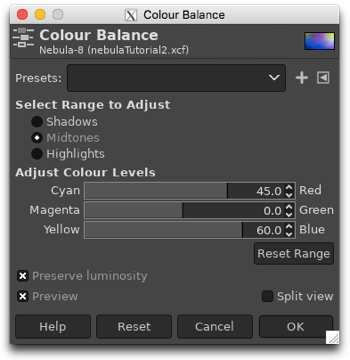
If you are not completely satisfied with the colours of your nebula, you can alter them with Colour Balance.
Image: Colours → Colour Balance
You can adjust the colours of the Shadows, Midtones and Highlights separately. With the Preview box checked, choose a combination that appeals to you and press [OK].
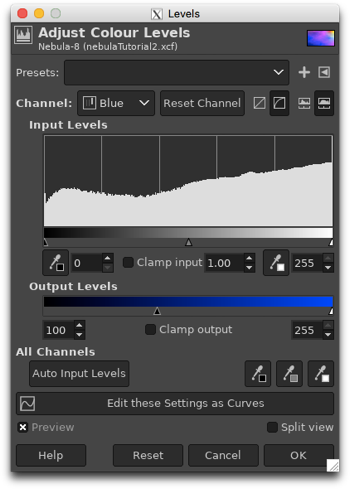
Further adjustments may be made with the Colour Levels.
See section 2.3 for more details.
Image: Colours → Levels
In the Channels menu, you can individually select the Red, Green or Blue channels before altering the Output Levels. (The sliders for the Output Levels are located directly below the Input Levels.) Ensure that the Preview box is checked and experiment with the various colours to get an effect that you like. Press [OK] when you are finished. In this example, I have suppressed the Green channel and accentuated the Blue channel.
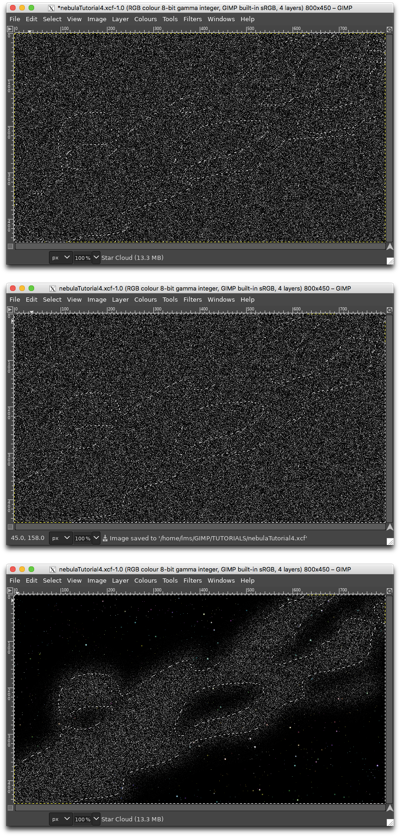
3.4 Effects of colour correction
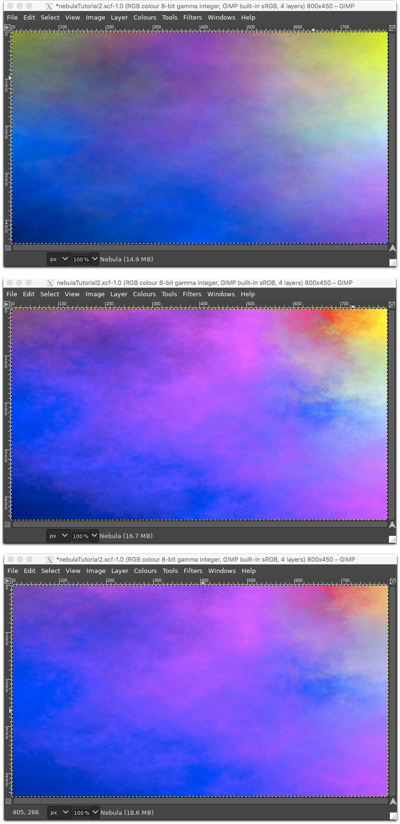
The top panel shows the original Plasma layer, the second panel shows the effect of adjusting the Colour Balance and the third panel shows the effect of adjusting the Output Levels.
3.4 Gaussian Blur
See section 2.6 for more details.
LAYER: Nebula
The details of the nebula may be too sharp so we will blur them to soften their appearance. For this we will use Gaussian Blur but experiment with some of the other blur filters. You may find that you prefer a different effect.
Image: Filters → Blur → Gaussian Blur
With the Preview box checked, try assorted values for the Size of the blur to get the desired result. Press [OK] when are you finished.
3.5 Opacity
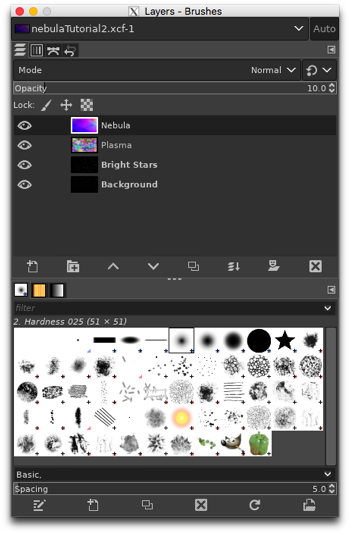
LAYER: Nebula
Now we reduce the opacity of the Nebula layer in order to let the stars shine through. This is done in the Layers window. The lower the value, the fainter the nebula. In this example, I have chosen an opacity of 10%.
3.6 Result
After adding a few decorative supernovae (see section 6), we get the following scene:

4. Technique #3: Vivid multi-colour nebula
This nebula is reminiscent of the Rho Ophiuchi cloud complex, a star-forming region with colourful clouds and dark regions running throughout. To construct it, we combine a variety of noise filters and adjust the levels of the individual colours (red, green, blue) as necessary. At the end, we will also need to move the star field layers from the bottom to the top in order for them to shine in front of the nebula.
4.1 Add Layer
LAYER: Topmost layer
We need to add a new layer to the top of the stack.
Image: Layer → New Layer
Name the layer ‘Nebula Bottom Plasma’ and choose Transparency as the Fill with colour. Press [OK] when you are finished.
4.2 Plasma
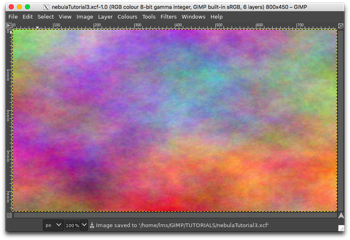
See section 3.2 for more details.
LAYER: Nebula Bottom Plasma
We will add random blobs of colour to this layer by using the Plasma filter.
Image: Filters → Render → Noise → Plasma
There are a number of options in the dialog box. After making sure that the Preview box is checked, choose a low value for the Turbulence value and press the New Seed button until you get a pleasing combination of colours. Press [OK] when you are finished. In this example, the Turbulence has been set to 1.0 and the New Seed button has been pressed several times to get a layer dominated by warm colours on the bottom and cooler colours on the top.
4.3 Add Layer
LAYER: Nebula Bottom Plasma
We need another layer.
Image: Layer → New Layer
Name the layer ‘Nebula Solid Noise’ and choose Transparency as the Fill with colour. Press [OK] when you are finished.
4.4 Solid Noise
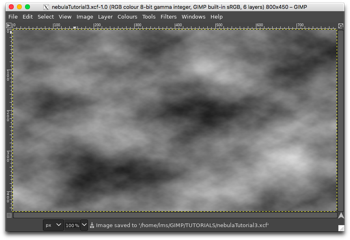
See section 2.2 for more details.
LAYER: Nebula Solid Noise
We will add random monotone blobs to our layer using the Solid Noise filter.
Image: Filters → Render → Solid Noise
There are a number of options in the dialog box. Choose values for the Size and Detail and press the Seed button until you get a pattern that you like. Press [OK] when you are finished. In this example, the X/Y Size has been set to 3.0 and the Detail has been set to 5.
4.5 Add Layer
LAYER: Nebula Solid Noise
We need yet another layer.
Image: Layer → New Layer
Name the layer ‘Nebula Top Plasma’ and choose Transparency as the Fill with colour. Press [OK] when you are finished.
4.6 Plasma
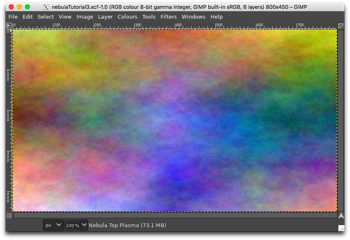
LAYER: Nebula Top Plasma
We will add random blobs of colour to this layer by using the Plasma filter.
Image: Filters → Render → Noise → Plasma
You will want this plasma layer to look quite different from the first one so alter the Turbulence and New Seed values accordingly. In this example, the Turbulence has been set to 1.0 and the New Seed button has been pressed several times to get a layer dominated by warm colours with a streak of cool colours across the middle.
4.7 Mode
See section 2.5 for more details.
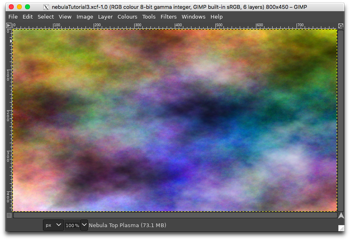
LAYER: Nebula Top Plasma
In the Layers window, set the layer Mode to Overlay. Overlay enhances contrast.
LAYER: Nebula Solid Noise
In the Layers window, set the layer Mode to Linear Burn. Linear Burn darkens the image overall but particularly the already-dark areas.
4.8 [optional] Colour correction
See sections 2.3 and 3.3 for more details.
LAYER: Nebula Top Plasma, Nebula Bottom Plasma
If the colours are too intense, feel free to adjust the Output Levels of the individual colours in one or both of the two plasma layers.
Image: Colours → Levels
In the dialog box, there are a number of options, but the important ones for this procedure are the Channel at the top and the Output Levels about halfway down. We are interested in the Red, Green and Blue channels in particular. Adjust the black and white points (as we do for the Input Levels) for each colour individually to get the effect that you want. Press [OK] when you are finished.
4.9 Move Layers
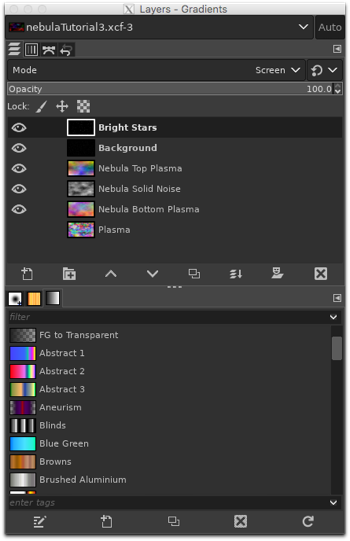
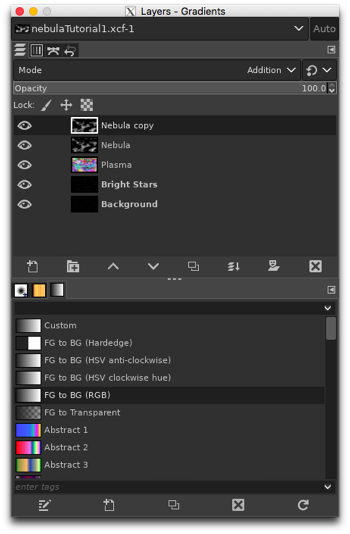
You should have the following layers appearing in your Layers window (top to bottom):
- Nebula Top Plasma
- Nebula Solid Noise
- Nebula Bottom Plasma
- [Plasma – optional from the Star Fields tutorial]
- Bright Stars
- Background (containing the faint stars)
If you used a Plasma layer to colour your star field, you will need to delete it or render it invisible (by clicking on the ‘eye symbol’) as it will affect the nebula layers in unexpected ways. Activate the Bright Stars layer and use the <up arrow> key in the Layers window to move the layer to the top. Then activate the Background (faint stars) layer and perform the same operation, placing it just below the Bright Stars layer. Your Layers window should now be in this order (top to bottom):
- Bright Stars
- Background
- Nebula Top Plasma
- Nebula Solid Noise
- Nebula Bottom Plasma
- [Plasma – invisible or deleted completely]
4.10 Mode
LAYER: Background
In the Layers window, set the layer Mode to Screen. The Bright Stars layer Mode should already be set to Screen.
Your stars should now be shining over a colourful nebulous backdrop.
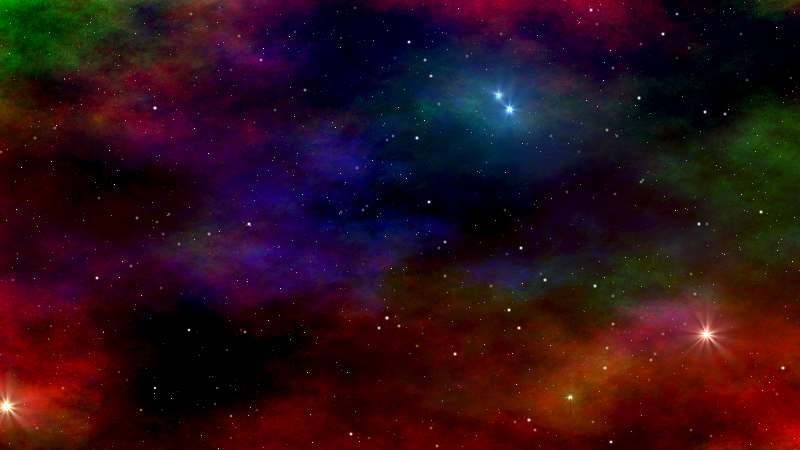
4.11 Result
After adding a few decorative supernovae (see section 6), we get the following scene:
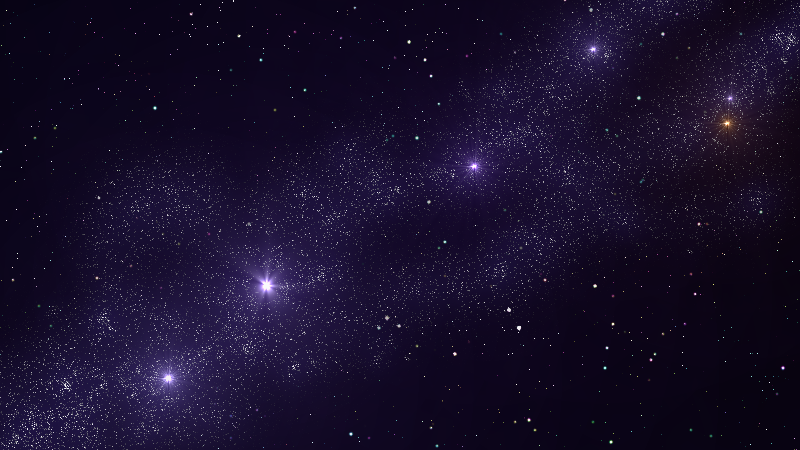
5. Technique #4: Star cloud
Millions of distant stars form the hazy star clouds of the Milky Way and the spiral arms of other galaxies. We create irregularly-shaped dense star fields, and blur and colour them to simulate this appearance.
5.1 Add Layer
LAYER: Topmost layer
Image: Layer → New Layer
Name the layer ‘Star Cloud’ and choose Transparency as the Fill with colour. Press [OK] when you are finished.
LAYER: Star Cloud
Then set your foreground colour to black and use the Bucket Tool to fill in the new layer.
Toolbox: Bucket Fill
You now have a new opaque black layer.
5.2 CIE lch Noise
LAYER: Star Cloud
See the star fields tutorial for more details.
Now we need to fill this layer with densely-packed white dots. Any of the CIE lch Noise, HSV Noise, Hurl or RGB Noise filters may be used to create a field of random dots, but I will use CIE Ich Noise in this example.
Image: Filters → Noise → CIE lch Noise
In the dialog box, there are a number of options. Make sure that the Preview box is checked and try altering the various values to see their effect on your image. Press [OK] when you are finished. The result is a black layer thickly covered in coloured dots.
5.3 Desaturate
See the star fields tutorial for more details.
LAYER: Star Cloud
Change the coloured dots to white dots by desaturating them.
Image: Colours → Desaturate → Desaturate
In the dialog box, there are several different modes for desaturating the image. I have simply used the default. Press [OK] when you are finished. The result is a black layer thickly covered in white dots.
5.4 Free Selection (Lasso) / [Invert] / Feather / Cut
LAYER: Star Cloud
Now we choose the Free Selection tool from the Toolbox window to select the region(s) that will form either the star clouds or the blank areas.
Toolbox: Free Selection (Lasso)
If the areas enclosed by the ‘marching ants’ are to be the star clouds, then we need to Invert the selection. If not, we simply continue to the next step. I invert my selection so that my star cloud will run diagonally from lower left to upper right.
Image: Select → Invert
We do not want an abrupt edge to the star clouds so we will feather the edges of our selection(s).
Image: Select → Feather
Enter a generous value. I have chosen 50 pixels. Press [OK] when you are finished.
Now we need to cut away the unwanted regions, leaving behind just the star cloud areas.
Image: Edit → Cut
To remove the residual ‘marching ants’ around the selected areas, select None in the Select menu.
Image: Select → None
5.5 Clone
LAYER: Star Cloud
The star cloud is of a fairly uniform density. We need to add variety. This is done with the Clone tool.
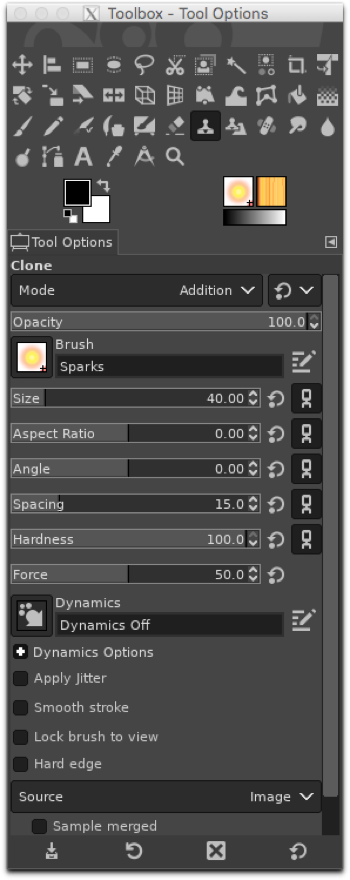
Toolbox: Clone
In the Tool Options dialog box, set the Mode to Addition. You will need to choose a brush too. The brushes are available from the Brushes dialog box. If you do not have this dialog box loaded automatically, it is available from the Windows submenu.
Image: Windows → Dockable Dialogues → Brushes
I have chosen the Sparks brush. It looks like a yellow fuzzy ball in the Brushes dialog box. Adjust the size of your brush as needed in the Tool Options dialog box. There are a variety of other options in the dialog box, such as Dynamics, that are worth exploring. Then, place the cursor somewhere on your star cloud and <control><click> to set your clone source. Then it is just a matter of moving the cursor around randomly, clicking, to add extra density to the star cloud.
5.6 Duplicate Layer
LAYER: Star Cloud
Make a duplicate of the Star Cloud layer
Image: Layer → Duplicate Layer
Rename the duplicate layer ‘Star Cloud Stars’. Set the Mode to Addition and then render it invisible by clicking on the ‘eye symbol’ in the Layers window.
5.7 Gaussian Blur
See section 2.6 for more details.
LAYER: Star Cloud
Return to the Star Cloud layer. We will blur this to give a cloudy appearance.
Image: Filters → Blur → Gaussian Blur
Choose values for the X/Y Size until you get the amount of blur that you like. Press [OK] when you are finished.
5.8 Colour Levels
See the star fields tutorial for more details.
LAYER: Star Cloud Stars
Now go back to the overlying Star Cloud Stars layer, making it visible again by clicking on the spot where the ‘eye symbol’ would be in the Layers window. Now that we have the underlying nebular glow, we need to reduce the number of overlying stars. We will do this adjusting the black and white points in the Input Levels.
Image: Colours → Levels
5.9 Colourise
See section 2.8 for more details.
LAYER: Star Cloud
We return to the Star Cloud layer to give it a bit of colour. Choose an appropriate combination from the Hue, Saturation and Lightness from the Colourise dialog box.
Image: Colours → Colourise
5.10 Result
After adding a few decorative supernovae (see section 6), we get the following scene:
6. Adding individual bright stars
Bright nebulae glow because of nearby stars. Add in a few bright stars using the Supernova filter. First, add a new transparent layer.
LAYER: Topmost layer
Image: Layer → New Layer
Name the layer ‘Supernova’ and choose Transparency as the Fill with colour. Press [OK] when you are finished. Now add a supernova to the scene.
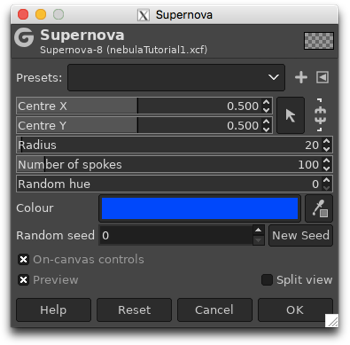
Image: Filters → Light and Shadow → Supernova
Make sure that the Preview box is checked. Nearly all of the options in the dialog box will need to be altered. The Centre X/Y boxes give the coordinates of the supernova, the Radius controls the size of the central star, the Number of spokes determines how many rays will emanate from the central star, and the Colour describes the main colour of the glow. Enter the coordinates of the supernova (how you do this depends upon which version of GIMP you are running) and then adjust the descriptive aspects of the supernova until you are satisfied with the results. Press [OK] when you are finished. Repeat this step as often as you like but don’t overdo it.
7. Closing thoughts
There are endless ways to create nebulae, involving various combinations of filters, layer modes and colour effects, or by simply drawing them. You may wish to use more than one technique in a single image. Keep trying new things to find what works for you.