On this page I demonstrate how to construct the hot, roiling ball of plasma that is a star. Stars come in a variety of sizes and colours (and even shapes — some stars are distinctly ellipsoidal). The hottest stars appears bluish; examples are Rigel (β Orionis) and Bellatrix (γ Orionis). Cooler stars are more yellow in appearance; the Sun is a good example, as is Capella (α Aurigae) and Rigil Kentaurus (α Centauri A). The coolest stars are orange or red; mighty Betelgeuse (α Orionis) and ruddy Antares (α Scorpii) are famous examples but the most common type of star in the galaxy, red dwarf stars, also fall into this category.
For a discussion of star colours and their corresponding digital codes, see Digital Color Codes of the Stars by Jan-Vincent Harre and René Heller, 2021, Astronomische Nachrichten, 302 (3), 578–587.
The techniques discussed below are adapted from a selection of online tutorials listed here.
TECHNICAL DETAILS: GIMP 2.10.18 on Ubuntu 20.04.2 1.7.0 LTS (August 2021)
TIP: Don’t be afraid to experiment with different settings in the windows and dialog boxes below. You can usually reverse a command by going to the Edit menu and selecting the Undo option.
TIP: Pay attention to which layer is currently active!
1. Preliminaries

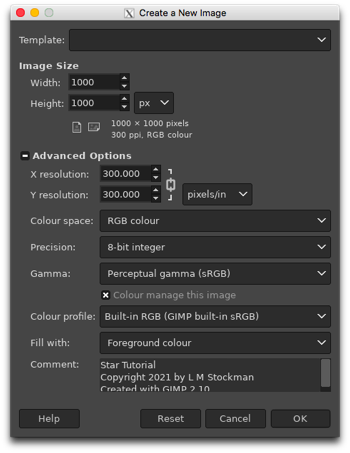
We begin by starting up GIMP and creating a new file. There are a variety of templates that you can use or you can just input your own dimensions and resolution. For instance, I have chosen a Width of 800 pixels and a Height of 450 pixels to give a 16:9 aspect ratio, plus a 72 pixels/inch Resolution since I don’t need high-definition. Most of the Advanced Options you can leave alone but make sure that you are working in the RGB Colour Space. Black is my default foreground colour so I have chosen to Fill my new image with that. The Comment section is for you to add whatever text you wish to have associated with your new file: image title, your name, copyright date, description, whatever. Press [OK] when you are happy with your choices and a new image will appear.
If your new image does not have a black background, then it is time to break out your Toolbox. In the Toolbox window, make black your foreground colour. Then use the Bucket Fill tool to fill in your image with the colour black.
Now make your background consisting of a basic star field and maybe a nebula or two.
Put this image aside for the moment. We will come back to it in section 4 when we are ready to add our star. Which star will you choose?
2. Cool star with convective envelope
Smaller, cooler main sequence stars like the Sun have a radiative core surrounded by a convective envelope; the smallest stars (red dwarfs) are convective throughout. Convection gives a ‘boiling’ appearance to the photosphere (visible surface) of the star.
2.1 New Image
Create another new file. This one should be square. Choose a generous size as it is easier to see and manipulate the details. In this example, my new image is 1000 pixels by 1000 pixels. Fill it with black, either at this stage or afterwards with the Bucket Fill tool.
This background layer simply provides contrast for the star that we will create.
2.2 New Layer
LAYER: Background
Add a transparent layer.
Image: Layer → New Layer
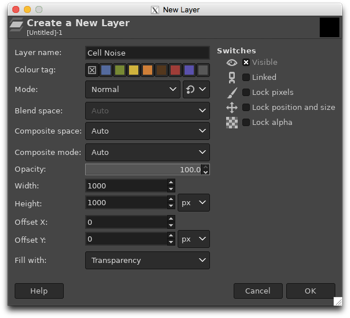
Name the layer ‘Cell Noise’ and choose Transparency as the Fill with colour. The Mode should be Normal. Press [OK] when you are done.
2.3 Cell Noise
LAYER: Cell Noise
We will use the Cell Noise filter to simulate convection cells on the surface of our star.
Image: Filters → Render → Noise → Cell Noise
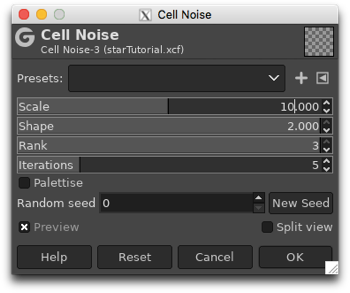
This filter fills the layer with irregularly-shaped grey cells with black centres, surrounded by white. In the dialog box, there are a number of options which control the appearance of the cells. Increasing the Scale packs more cells into the layer. Decreasing the Shape makes the cells more angular, with the black centres more prominent. The Rank runs from 1 to 3, with 3 giving the lightest appearance. Increasing the Iterations increases the complexity of each cell. I am looking for a subtle convective effect so in this example, I have chosen a Scale of 10.000, kept the default Shape of 2.000, increased the Rank to 3 and increased the Iterations to 5. Experiment with the values and when you are satisfied, press [OK].
2.4 Gaussian Blur
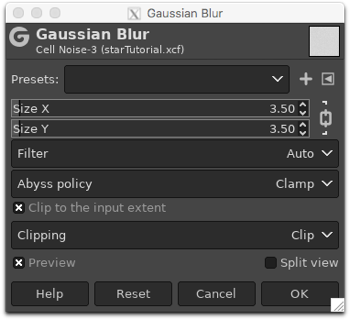
LAYER: Cell Noise
Soften the granular effect with a bit of Gaussian Blur.
Image: Filters → Blur → Gaussian Blur
In this example, I have chosen a blur Size of 3.5. Press [OK] when you are ready to proceed.
2.5 New Layer
See section 2.2 for more details.
LAYER: Cell Noise
Add a transparent layer.
Image: Layer → New Layer
Name the layer ‘Solid Noise’ and choose Transparency as the Fill with colour. However, in this case, the Mode should be Pin Light. Press [OK] when you are done. If you do not set the layer mode in this step, then go to Layers window and change the Mode from Normal to Pin Light for this new layer. (If this mode is not in your version of GIMP, then Burn or Hard Light will give a similar effect.)
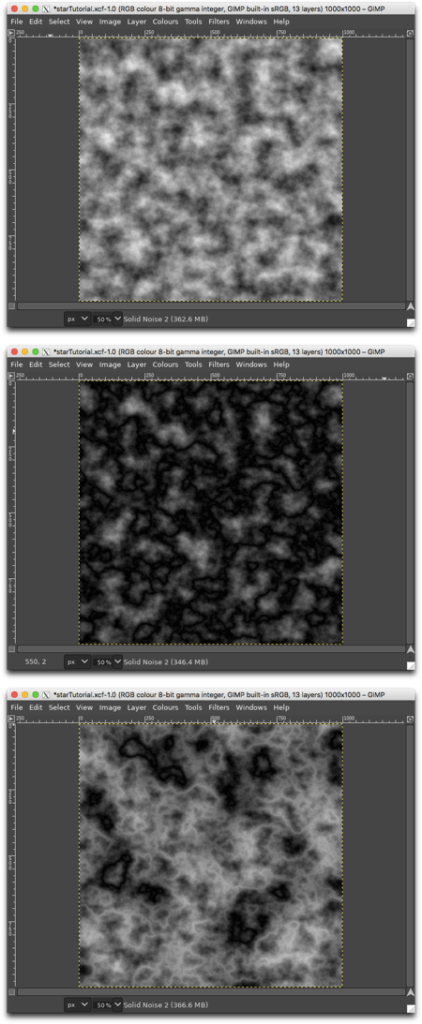
2.6 Solid Noise
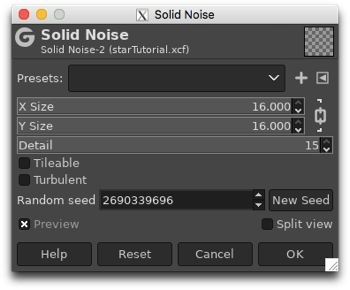
LAYER: Solid Noise
We will use the Solid Noise filter to generate star spots.
Image: Filters → Render → Noise → Solid Noise
There are a number of options in the dialog box, including the X/Y Size (the relative size of the blobs), Detail (how much fine detail there is within a blob) and Seed (for randomisation). Choose values for the Size and Detail and press the Seed button until you get a pattern of spots that you like. Press [OK] when you are finished. In this example, I have chosen the maximum Size of 16.000, the maximum Detail of 15, and pressed the Seed button several times.
2.7 Erase
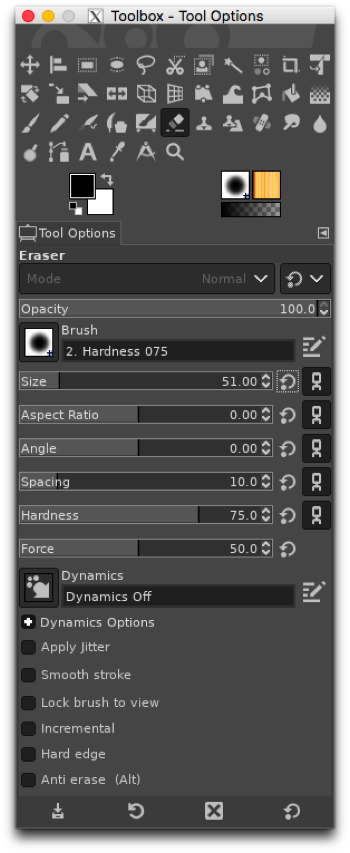
LAYER: Solid Noise
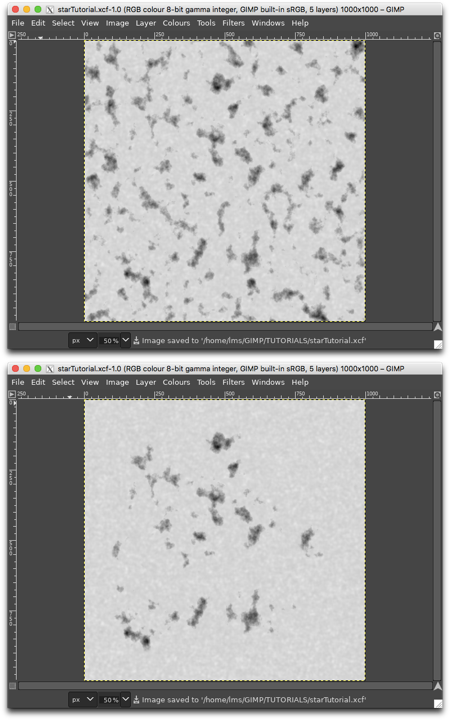
You should see dark splotches from the Solid Noise layer overlaid on the lighter mottled Cell Noise layer. The dark splotches are our star spots. If there are too many, use the Eraser to remove unwanted spots. It is a good idea to remove the spots that are near the edges of the image. These will become seriously distorted when we turn our square image into a circle.
Toolbox: Eraser
Adjust the size of the Eraser to suit and choose 100% opacity. Then erase and reshape the spots to your liking.
2.8 Merge
LAYER: Solid Noise
Now merge the Solid Noise layer (containing the star spots) down onto the Cell Noise layer (containing the convection cells).
Image: Layers → Merge Down
We now have a single layer called Cell Noise. Rename the layer ‘Star’. You rename a layer by double clicking the name in the Layers window and typing in the new name, then pressing the <enter> key.
2.9 Lens
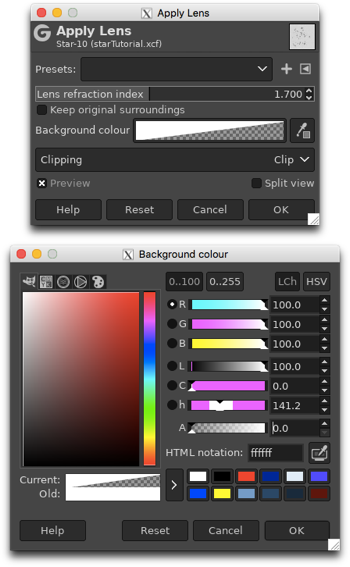
LAYER: Star
Now we warp our flat square picture into a round one resembling a sphere.
Image: Filters → Distorts → Apply Lens
Check the Preview box and uncheck the Keep original surroundings option. Click on the Background colour bar and turn the alpha channel (labelled as A in the dialog box) down to zero to get full transparency. The Lens refraction index controls the simulated curvature. Try some different values to see the effect. In this example, I have used the default value. Once you have something that you like, press [OK].
2.10 Scale Layer / Layer to Image Size
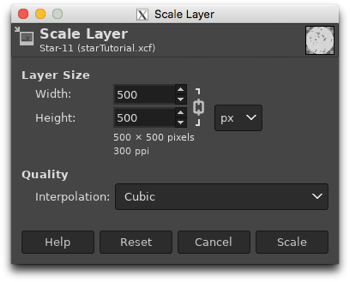
LAYER: Star
Our star fills the layer. We need to reduce its size so that we can add glow effects around the edge without them getting cut off. We can do this by scaling the layer.
Image: Layer → Scale Layer
The dialog box shows the current size of the layer. Decide how much smaller you want your star to be and enter the width (or height). Make sure that the ‘chain’ to the right of the Width and Height boxes is unbroken so that the layer will scale equally in both directions. Press [OK] when you are finished. In this example, I have halved the size to 500 pixels by 500 pixels.
Once we have a smaller star in a smaller layer, return the layer to the image size.
Image: Layer → Layer to Image Size
This leaves us with a smaller star in a larger layer.
2.11 Adding colour
LAYER: Star
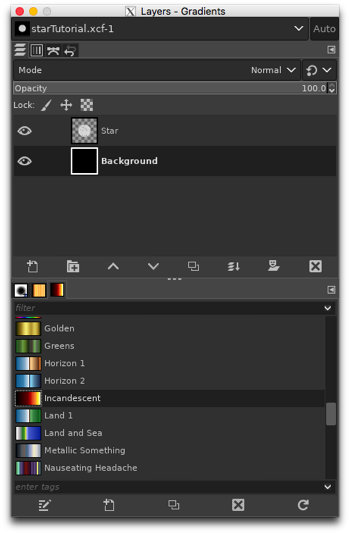
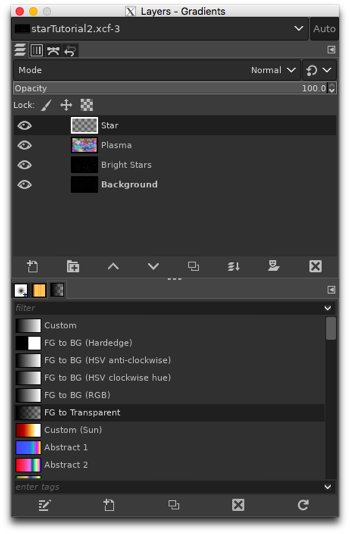
At the moment we have a monochrome star consisting of shades of grey. There are a number of ways of adding colour to the image. One way is to use the Colourise option in the Colours menu. We can also try mapping a gradient to the image. To accomplish this, we first must have the Gradients dialog box open. If your version of GIMP does not automatically load that when it starts, go to the Windows menu to open it.
Image: Windows → Dockable Dialogues → Gradients
Look for a gradient which is shaded from very dark red to red to orange to yellow. In English it is called Incandescent. Click on it. Then go to the Colours menu.
Image: Colours → Map → Gradient Map
This maps the darkest colours of the gradient to the darkest parts of the image, the lightest colours of the gradient to the lightest parts of the image, and everything in between. You should have sphere of orange and yellow swirls, with dark red star spots scattered throughout.
2.12 [optional] Adjusting the colour
LAYER: Star
You can adjust the colour through various options in the Colours menu. The Levels option is particularly useful.
2.13 Ellipse Selection / Shrink / Invert / Gaussian Blur
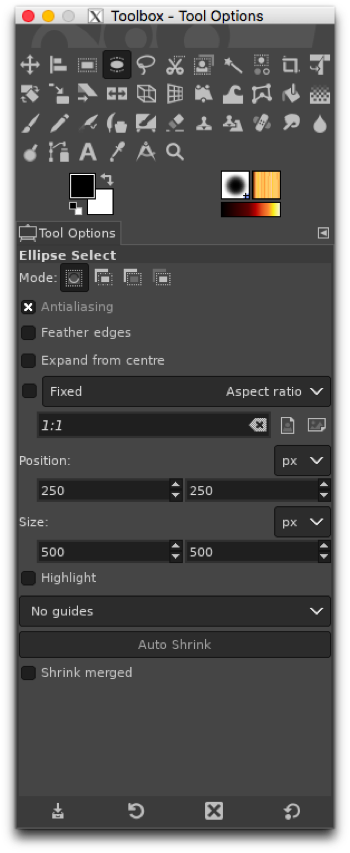
LAYER: Star
The edge of the star is too sharp. We will blur it slightly. To do this, use the Ellipse Selection tool in the Toolbox window to perfectly fit the star.
Toolbox: Ellipse Selection
The Tool Options dialog box is helpful for getting an exact fit. In this example, the star is 500 pixels wide and 500 pixels tall, and is centred in the layer which is 1000 pixels by 1000 pixels. Once you have your star outlined in ‘marching ants’, shrink the selection by one or two pixels.
Image: Select → Shrink
Finally, invert the selection.
Image: Select → Invert
This has the effect of choosing the exterior of the circle rather than the interior. Then activate the Gaussian Blur filter to blur the edge slightly.
Image: Filters → Blur → Gaussian Blur
In this example, I have chosen a blur radius of 1.5. Press [OK] when you are satisfied.
Finally, get rid of the ‘marching ants’ along the selection line.
Image: Select → None
2.14 Duplicate Layer
LAYER: Star
Make a duplicate of the Star layer.
Image: Layer → Duplicate Layer
Rename the duplicate layer ‘Corona’. Then move this layer below the Star layer using the down arrow in the Layers window.
2.15 Ripple
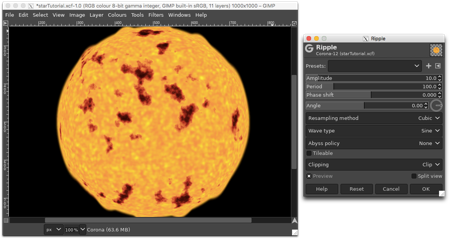
LAYER: Corona
Apply the Ripple filter twice (or more) to distort the perfect circle of the corona.
Image: Filters → Distorts → Ripple
The dialog box has several important options. The Amplitude controls the height of the wave, the Period gives the wavelength and the Angle moves the waves around the edge. Choose a small Amplitude and adjust the Period to give some ripples around the edge. Press [OK] when you are finished. Then repeat the exercise with a different Amplitude and Period and change the Angle by at least 90°. You should end up with a slightly lumpy circle.
2.16 Zoom Motion Blur
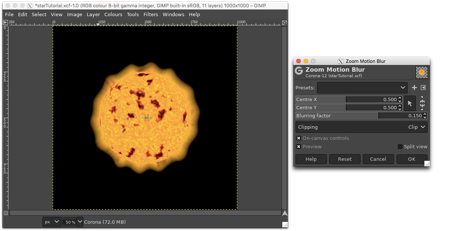
LAYER: Corona
The Zoom Motion Blur extends and blurs the edge of the lumpy circle.
Images: Filters → Blur → Zoom Motion Blur
In this example, I have chosen a Blurring factor of 0.150. Press [OK] when you are done.
NOTE: In earlier versions of GIMP, this effect is found in the Motion Blur filter. Choose the Zoom option.
2.17 Opacity
LAYER: Corona
In the Layers window, reduce the Opacity to a low value. In this example, I have chosen 5.0. Your image now has a spotted orange-yellow circle surrounded by a faint, irregular cloud.
2.18 Smudge
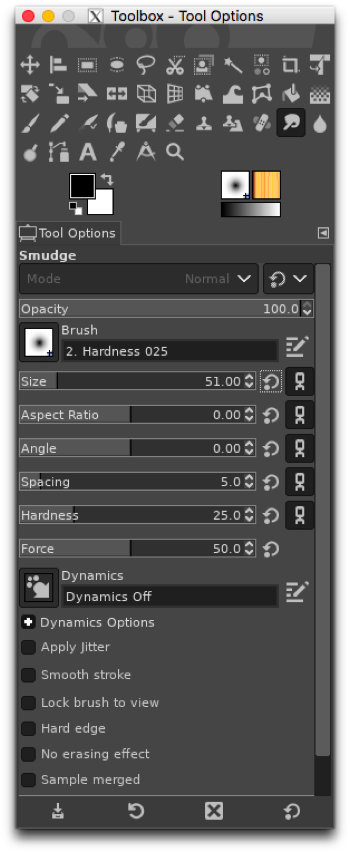
LAYER: Star
Finally, add prominences and explosions to the surface and edge of the star using the Smudge tool. Choose a simple soft round brush and adjust the Size and Hardness in the Tool Options dialog box to suit.
Toolbox: Smudge
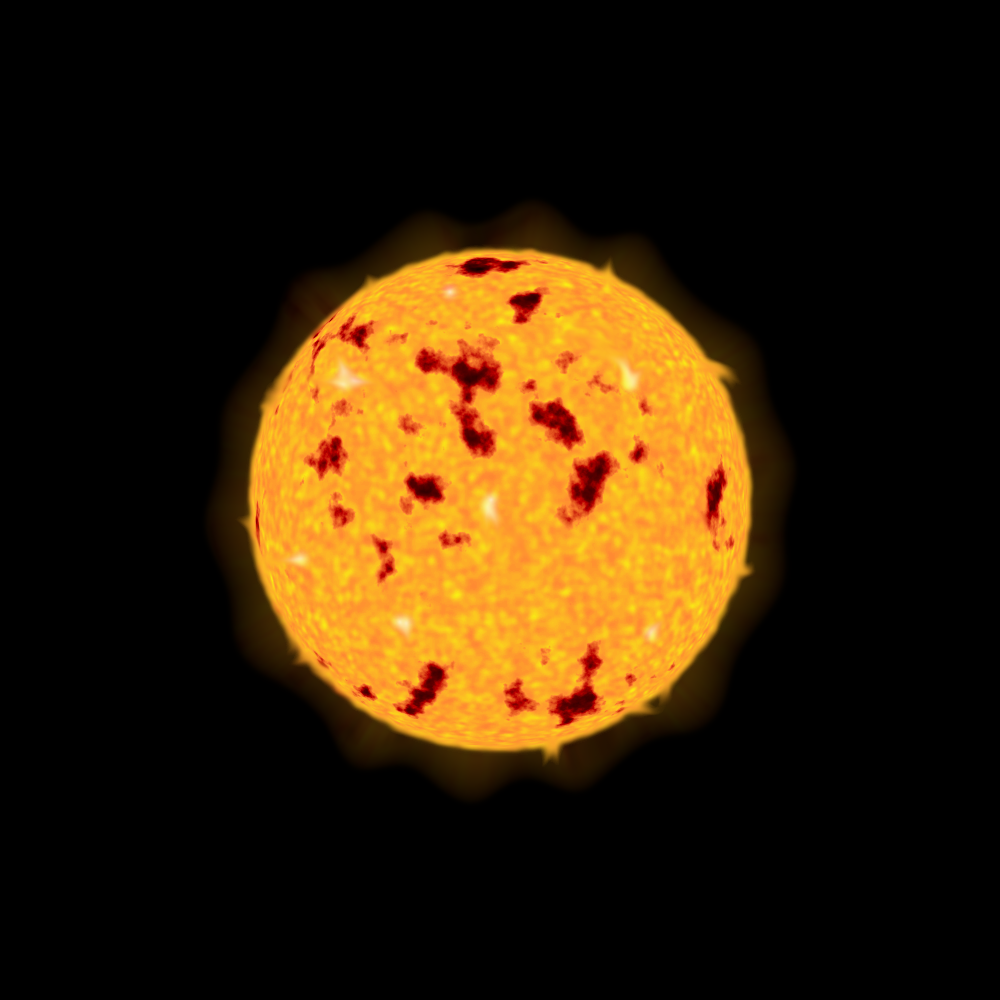
2.19 Result
3. Hot star with radiative envelope
Larger, hotter main sequence stars have a convective core surrounded by a radiative envelope.
3.1 New Image
See section 2.1 for more details.
Create another new file. This one should be square. Choose a generous size as it is easier to see and manipulate the details. In this example, my new image is 1000 pixels by 1000 pixels. Fill it with black, either at this stage or afterwards with the Bucket Fill tool.
This background layer simply provides contrast for the star that we will create.
3.2 New Layer
See section 2.2 for more details.
LAYER: Background
Add a square transparent layer.
Image: Layer → New Layer
Name the layer ‘Star’ and choose Transparency as the Fill with colour. The Mode should be Normal.
3.3 Solid Noise / Difference Clouds
See section 2.6 for more details.
LAYER: Star
We will use the Solid Noise filter to generate the stormy, spotted surface of the star.
Image: Filters → Render → Noise → Solid Noise
In this example, I have chosen a Size of 12.000 and the maximum Detail of 15. I’ve also pressed the New Seed button several times. Press [OK] when you are finished. We now have a mottled grey layer.
We will next use the Difference Cloud filter twice to add detail to the surface.
Image: Filters → Render → Noise → Difference Clouds
The first time you use this filter, the image should be darker and more detailed. The second time it should be lighter, with light filaments and dark spots. You can repeat this if you wish.
3.4 Lens
LAYER: Star
Follow the instructions in section 2.9.
3.5 Scale Layer / Layer to Image Size
LAYER: Star
Follow the instructions in section 2.10.
3.6 Ellipse Selection / Shrink / Invert / Gaussian Blur
LAYER: Star
Follow the instructions in section 2.13.
3.7 Adding colour
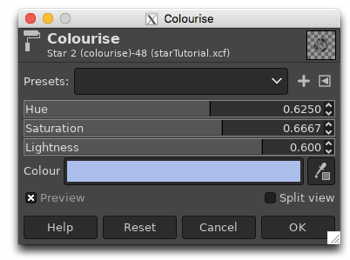
LAYER: Star
See section 2.11 for more details.
At the moment we have a monochrome star consisting of shades of grey. There are a number of ways of adding colour to the image. One way is to use the Gradient Map option in the Colours menu. We can also use Colourise.
Image: Colours → Colourise
Make sure that the Preview box is checked, then adjust the Hue, Saturation and Lightness to the desired colour. (You can also choose the colour by clicking on the colour box.) Press [OK] when you are finished. In this example, I am creating a blue star.
3.8 Duplicate Layer
LAYER: Star
Follow the instructions in section 2.14 to create the Corona layer which is placed below the Star layer.
3.9 Ripple
LAYER: Corona
Follow the instruction in section 2.15.
3.10 Zoom Motion Blur / Gaussian Blur / Opacity
LAYER: Corona
Follow the instructions in sections 2.16 and 2.17. In this example, I also apply the Gaussian Blur filter with a blur Size of 10.5 before reducing the opacity of the layer to 30%.
3.11 Smudge
LAYER: Star
Follow the instructions in section 2.18.
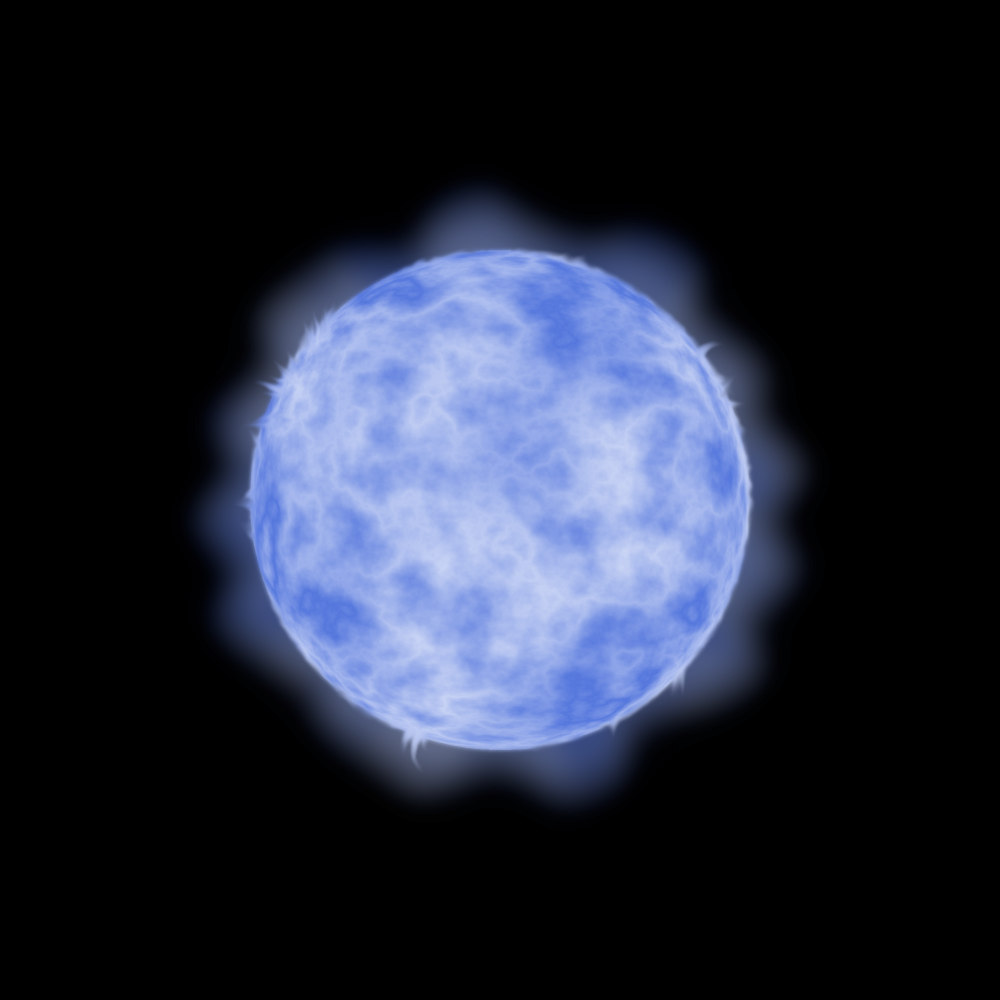
3.12 Result
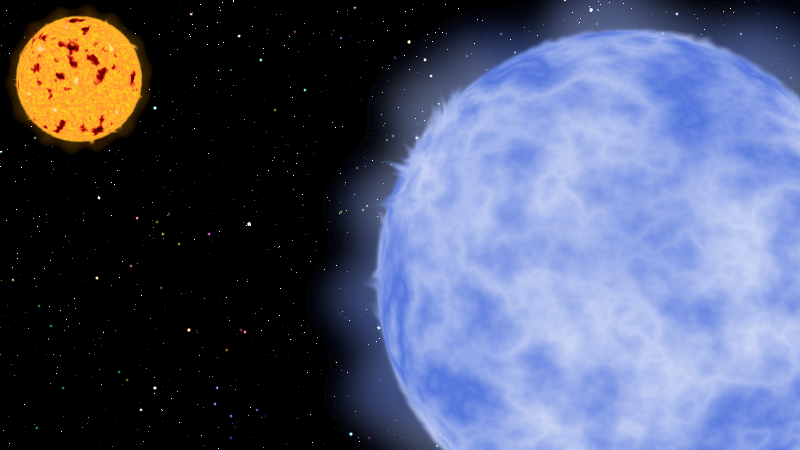
4. Star in space
It is time to place our star from section 2 or 3 in the outer space background that we created in step 1.
4.1 Scale Image
Star Image: Image: Image → Scale Image
We have created our star at a much larger scale that our outer space background so we need to scale our image to an appropriate size. Press [SCALE] when you are finished.
4.2 Copy
In the Layers window, click on the ‘eye symbol’ next to the Background layer. Your star should now appear above a grey-and-white-chequered background which is how GIMP denotes transparency. Make a copy of this image.
Star Image: Image: Edit → Copy Visible
4.3 Paste
We return to our space background image. Paste the GIMP Clipboard (which holds the star image) into the image.
Starry Background Image: Image: Edit → Paste
Starry Background Image: Image: Layers → To New Layer
Rename the ‘Pasted Layer’ to ‘Star’.
4.4 Final positioning
Starry Background Image: LAYER: Star
Use the Move tool in the Toolbox window to place the star in its final position.
4.5 Layer to Image Size
Starry Background Image: LAYER: Star
If the size of the Star layer differs from the size of the image, you can change it.
Image: Layer → Layer to Image Size
4.6 Result
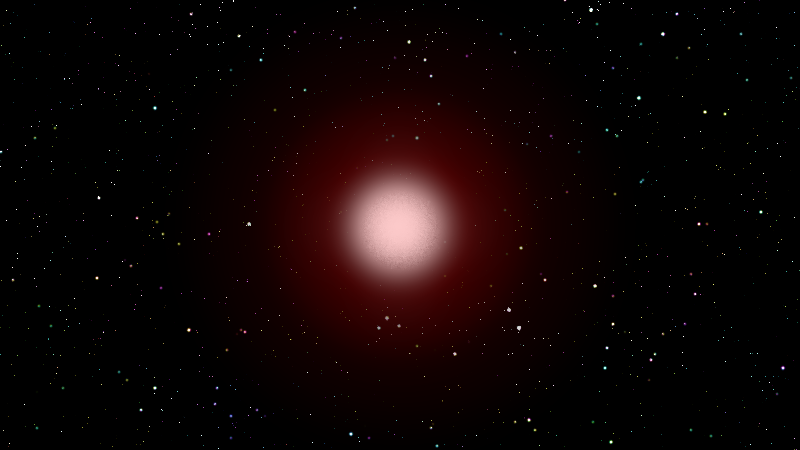
5. Bright featureless star
The two types of stars that we have created appear as through a filter which reveal details of the photosphere. However, when viewed by the naked eye, a star would be virtually featureless, a blinding ball of plasma. We can create such a star directly in our starry background image.
5.1 New Layer
See section 2.2 for more details.
LAYER: Uppermost layer
Add a new transparent layer.
Image: Layer → New Layer
Name the layer ‘Star’ and choose Transparency as the Fill with colour. The Mode should be Normal.
5.2 Gradient
See section 2.11 for more details about gradients.
LAYER: Star
We will use a series of gradients to create the glow surrounding the star.
Image: Tools → Paint Tools → Gradient
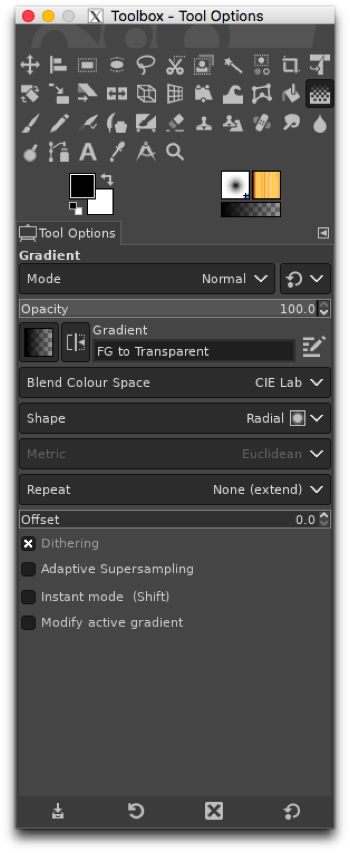
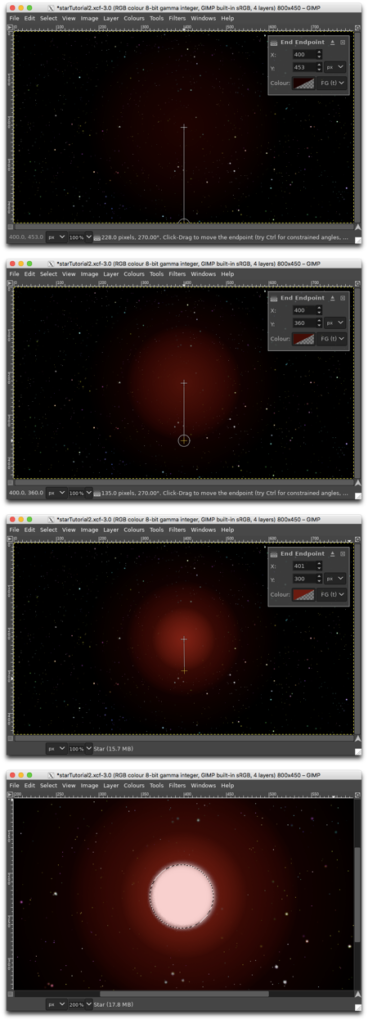
The Gradient tool is also available in the Toolbox window. For the Shape, choose Radial. In the Gradients window, choose FG to Transparent (foreground to transparent). Now decide where the star will be located in the image and note the coordinates.
We will carry out the following instructions several times. Begin with a very dark colour and go out to a large radius. Then choose a lighter colour and a smaller radius for the second layer, and so on. You can make as many layers as you wish.
- Click on the foreground colour in the Toolbox window and choose a colour.
- Click on the position of the centre of the star (it does not need to be exact but get as close as you can) and drag the cursor to the desired distance from the centre. Press <enter> when you have the size that you want.
In this example, I have chosen a selection of red colours for my outer glow. In HTML notation, they are 220000 (large radius), 550000 (medium radius), and 880000 (small radius).
NOTE: In older versions of GIMP, the Gradient tool is known as the Blend tool and operates slightly differently. Instead of pressing <enter> to complete the action, you simply release the mouse button at the desired radius.
5.3 Ellipse Selection / Bucket Fill
LAYER: Star
Use the Ellipse Selection tool in the Toolbox window to outline the surface of the star at the centre of the glow.
Toolbox: Ellipse Selection
A bit of feathering (available in the Tool Options) will soften the edge. Once you have it place and sized correctly, choose the Bucket Fill tool in the Toolbox window.
Toolbox: Bucket Fill
Click on the foreground colour in the Toolbox window and choose a light colour (or white) for the star. Then click inside the selection to fill in the circle with that colour. In this example, I have chosen the colour ffcccc (HTML notation).
Make a note of the size and placement of the selection before removing the ‘marching ants’ surrounding it.
Image: Select → None
5.4 Gaussian Blur
See section 2.4 for more details.
LAYER: Star
Blend the colours with the Gaussian Blur filter.
Image: Filters → Blur → Gaussian Blur
Choose a blur Size which gives a smooth transition between your colour layers. In this example, I have chose 12.5.
5.5 Ellipse Selection / Pick
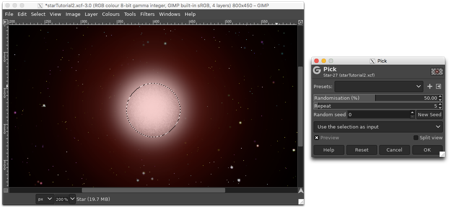
LAYER: Star
Redo the Ellipse Selection around the star. It does not have to be exact but try to get as close as you can.
Toolbox: Ellipse Selection
Then we will give a little bit of texture to the surface of the star using the Pick noise filter.
Image: Filters → Noise → Pick
In the dialog box, increase Repeat until you get a suitable texture. You can repeat this step several times to get a stronger effect. Press [OK] when you are satisfied. In this example, I have used just 5 for my Repeat value.
Once again, remove the ‘marching ants’.
Image: Select → None
5.6 Result