On this page I demonstrate how to construct a ring system around a planet. All of the gas giants in the Solar System contain rings although only Saturn’s ring system is readily visible. But in our imagination, any planet may be adorned with a beautiful set of rings!
The techniques discussed below are adapted from a selection of online tutorials listed here.
TECHNICAL DETAILS: GIMP 2.10.18 on Ubuntu 20.04.2 1.7.0 LTS (August 2021)
TIP: Don’t be afraid to experiment with different settings in the windows and dialog boxes below. You can usually reverse a command by going to the Edit menu and selecting the Undo option.
TIP: Pay attention to which layer is currently active!
1. Preliminaries

We begin by starting up GIMP and creating a new file. There are a variety of templates that you can use or you can just input your own dimensions and resolution. For instance, I have chosen a Width of 800 pixels and a Height of 450 pixels to give a 16:9 aspect ratio, plus a 72 pixels/inch Resolution since I don’t need high-definition. Most of the Advanced Options you can leave alone but make sure that you are working in the RGB Colour Space. Black is my default foreground colour so I have chosen to Fill my new image with that. The Comment section is for you to add whatever text you wish to have associated with your new file: image title, your name, copyright date, description, whatever. Press [OK] when you are happy with your choices and a new image will appear.
If your new image does not have a black background, then it is time to break out your Toolbox. In the Toolbox window, make black your foreground colour. Then use the Bucket Fill tool to fill in your image with the colour black.
Now make your background consisting of a basic star field and maybe a nebula or two.
Put this image aside for the moment. We will come back to it in section 5 when we are ready to add our ringed planet.
2. Planet
2.1 New image
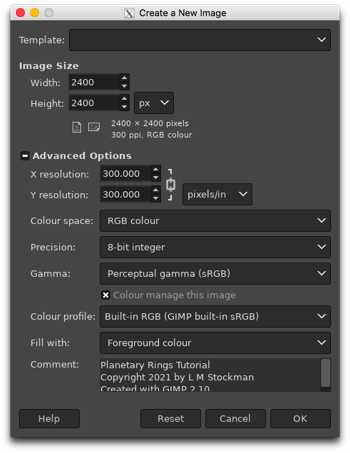
Create another new file. This one should be square. Decide how big you wish your planet layer to be and then triple it to get the dimensions of the image. (This is assuming that the ring diameter is about three times the planet diameter. Scale your image accordingly.) In this example, my planet will be (approximately) 800 pixels by 800 pixels so my new image will be 2400 pixels by 2400 pixels. Fill it with black, either at this stage or afterwards with the Bucket Fill tool.
This background layer simply provides contrast for the planet and ring system that we will create.
2.2 New Layer
LAYER: Background
Add a square transparent layer.
Image: Layer → New Layer
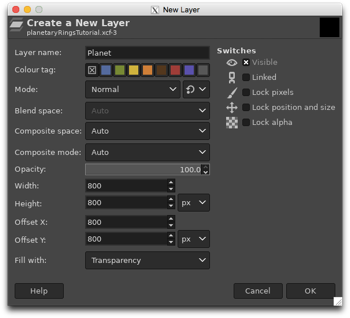
Name the layer ‘Planet’ and choose Transparency as the Fill with colour. The dimensions should be square. In this example, both the Width and Height are 800 pixels. I want the new layer to be centred so I have chosen an Offset of 800 pixels in both the X and Y directions. (The coordinates of the offset are actually the coordinates of the upper left corner of the layer.)
2.3 Create planet
LAYER: Planet

Using either the rocky planet or gas giant tutorials, create a planet. In this example, I have created a rocky planet in a gibbous phase.
You should now have a planet centred in your plain black square image.
3. Rings
3.1 New Layer

LAYER: Planet
Add a square transparent layer.
Image: Layer → New Layer
Name the layer ‘Rings’ and choose Transparency as the Fill with colour. The dimensions should be the same as the image. In this example, the layer is 2400 pixels by 2400 pixels.
If necessary, set your foreground colour to black. Then use the Bucket Fill tool to fill in the layer, turning it black.
Toolbox: Bucket Fill
3.2 CIE lhc Noise
LAYER: Rings
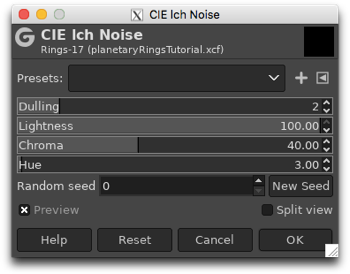
Any of the CIE lch Noise, HSV Noise, Hurl or RGB Noise filters may be used to create a field of random dots. Here I demonstrate the use of the CIE lch Noise filter.
Image: Filters → Noise → CIE lch Noise
In the dialog box, there are a number of options. Maximise the Lightness and press [OK]. The result is a black layer thickly covered in coloured dots.
3.3 Desaturate
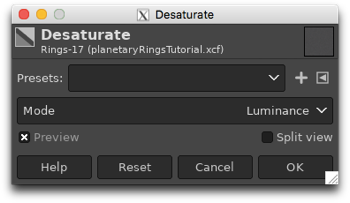
LAYER: Rings
Change the coloured dots to white dots by desaturating them.
Image: Colours → Desaturate → Desaturate
In the dialog box, there are several different modes for desaturating the image. I have simply used the default. Press [OK] when you are finished. The result is a black layer thickly covered in white dots.
3.4 Duplicate Layer
LAYER: Rings
We need a duplicate of our Rings layer.
Image: Layer → Duplicate Layer
Rename the duplicate layer ‘Particles’. You rename a layer by double clicking the name in the Layers window and typing in the new name, then pressing the <enter> key.
3.5 Mode
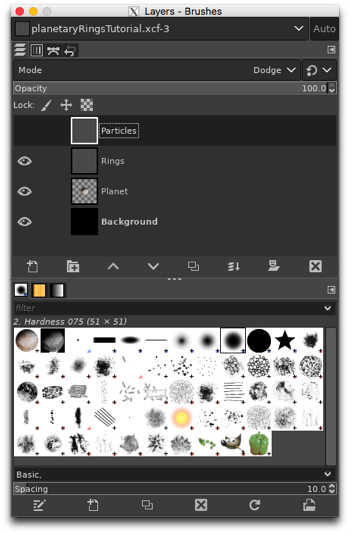
LAYER: Particles
In the Layers window, change the Mode from Normal to Dodge. Then temporarily render this layer invisible by clicking on the ‘eye symbol’ for this layer in the Layers window.
3.6 New Layer
See section 3.1 for more details.
LAYER: Rings
Return to the Rings layer and add a square transparent layer above it.
Image: Layer → New Layer
Name the layer ‘Noise’ and choose Transparency as the Fill with colour. The dimensions should be the same as the image. In this example, the layer is 2400 pixels by 2400 pixels.
From top to bottom, you should have the following layers:
- Particles
- Noise
- Rings
- Planet
- Background
3.7 Simplex Noise
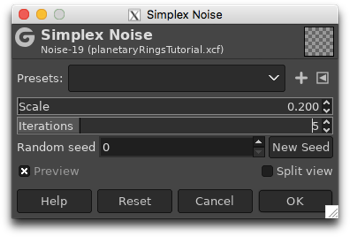
LAYER: Noise
Add a random black and white pattern to this layer using the Simplex Noise filter.
Image: Filters → Render → Noise → Simplex Noise
In the dialog box, there are a number of options, but the most important ones are the Scale and the Iterations. Reduce the Scale so that there are far fewer black and white zones but make the edges more complicated by increasing the Iterations. In this example, I have used 0.2 for the Scale and 5 for the Iterations.
3.8 Mode / Merge Down
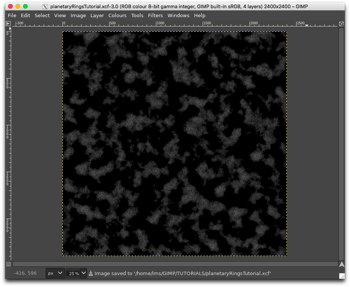
LAYER: Noise
In the Layers window, change the Mode from Normal to Multiply. Then merge this layer with the Rings layer.
Image: Layer → Merge Down
This eliminates the Noise layer, leaving us with an altered Rings layer consisting of cloudy areas populated with white dots.
3.9 Polar Coordinates
LAYER: Rings
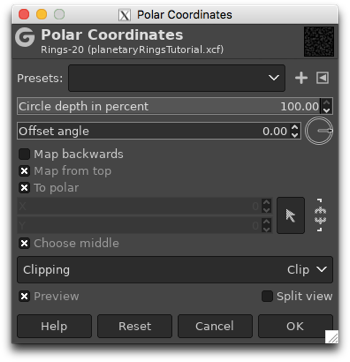
We will now distort this square into a perfect circle by using the polar coordinate transform.
Image: Filters → Distorts → Polar Coordinates
The Circle depth in percent should be 100.00 and the To polar box should be checked. Press [OK]. We now have a perfect circle of random white dots and black spaces. There may be a faint vertical line artefact within the circle but do not worry about this. It will disappear later.
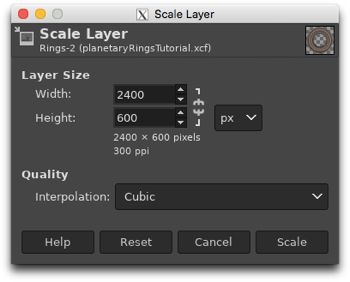
3.10 Scale Layer
LAYER: Rings
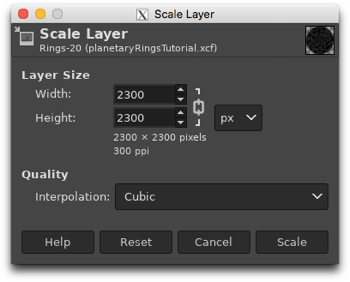
We need to slightly reduce the size of our speckled circle so that it no longer touches the sides of its layer. Why? We will eventually want to blur the ring slightly to soften its appearance. By making sure that our ring is well within the image, the blurring effect will not get cut off, leaving a sharp edge wherever the circle touches the edge of the layer.
Image: Layer → Scale Layer
In this example, I have used the size of 2300 pixels by 2300 pixels which is slightly smaller than my original 2400 pixels by 2400 pixels image size.
3.11 Layer to Image Size
LAYER: Rings
Now that our speckled circle is reduced in size, we need to resize the layer to again match the image.
Image: Layer → Layer to Image Size
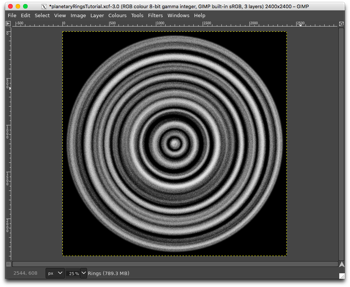
3.12 Circular Motion Blur
LAYER: Rings
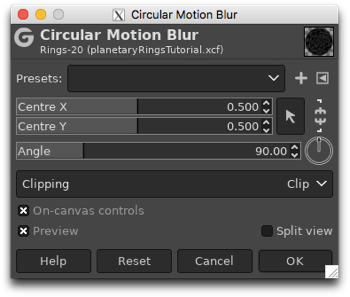
Now we turn our random white dots and black spaces into rings.
Image: Filters → Blur → Circular Motion Blur
Choose a larger angle than the default or you will be here all night. Too large of a value will result in artefacts around the edge of the image so experiment with various angles. Press [OK] when you are ready to proceed.
You will need to repeat this step a number of times to get smooth-looking rings. You may vary the angle or simply use the same value over and over again. If you wish to use the same angle each time, you can use the Repeat option under Filters.
Image: Filters → Repeat “Circular Motion Blur”
If you wish to change the angle, use the Re-Show option instead.
Image: Filters → Re-Show “Circular Motion Blur”
In older versions of GIMP, this effect is achieved through the Motion Blur filter, using the Radial option.
3.13 Colour Levels
LAYER: Rings
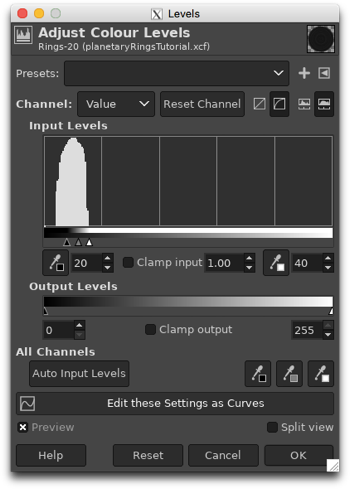
The rings are a bit murky and indistinct. Sharpen them up by adjusting their colour Levels.
Image: Colours → Levels
In the dialog box, there are a number of options, but the most important ones are the Input Levels. The black triangle slider (first text box) determines the black point. All values below this are converted to black. Permitted values range from 0 to the white point. The white triangle slider (third text box) determines the white point. All values above this are converted to white. Permitted values range from the black point to 255. The grey triangle slider (second text box) controls the grey point. Make sure that the Preview box is checked, then decrease the white point and increase the black point to achieve the desired ring brightness and contrast. Press [OK] when you are finished. In this example I have used a black point of 20 and a white point of 40 to get a distinct ring pattern.
NOTE: There are four buttons following the Channel options. The first two switch between linear and perceptual (non-linear) modes and the last two switch between linear and logarithmic histograms in the Input Levels. I usually use perceptual mode and logarithmic histograms.
3.14 Gaussian Blur
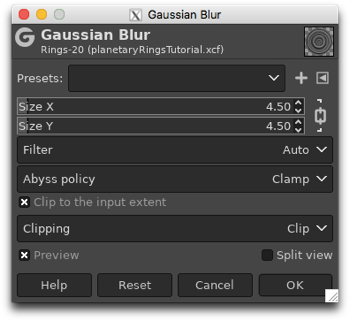
LAYER: Rings
Blur the rings slightly to even out the tone and remove any artefacts within the rings.
Image: Filters → Blurs → Gaussian Blur
With the Preview box checked, increase the Size of the blur radius until you are satisfied with the results. Press [OK] when you are finished.
3.15 Merge Down
LAYER: Particles
Return to the Particles layer and make it visible by clicking in the space where the ‘eye symbol’ would be. Merge the Particles layer with the Rings layer.
Image: Layer → Merge Down
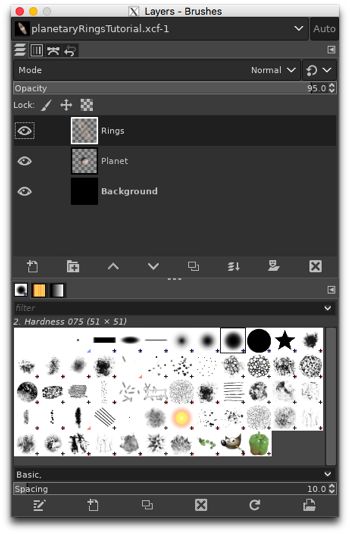
This gives grainy-looking rings. You should now have three layers. From top to bottom they are
- Rings
- Planet
- Background
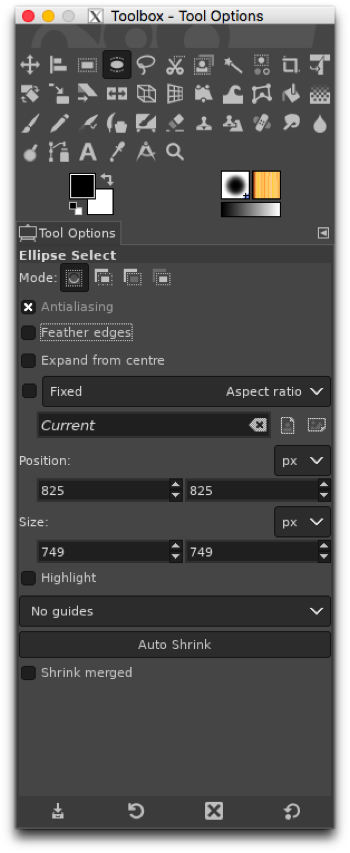
3.16 Ellipse Selection / Feather / Cut
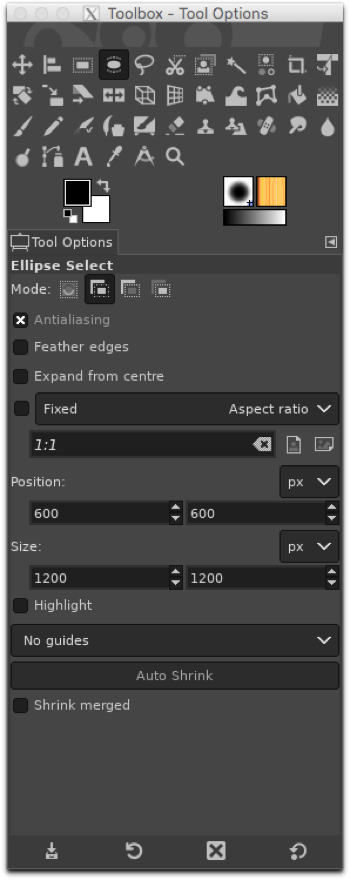
LAYER: Rings
We need to cut out the centre of the disk to reveal the planet beneath. This is done with the Ellipse Selection tool in the Toolbox.
Toolbox: Ellipse Selection
Create a circle somewhat larger than the dimensions of your planet and centred in the image. Since my planet has a diameter of about 800 pixels, I have chosen a circle with a diameter of 1200 pixels to be the boundary of the innermost ring. Once your ellipse is properly situated, feather the edges to soften the inner ring border.
Image: Select → Feather
In this example, I have used 50 pixels.
NOTE: You can also use the built-in Feather edges option in the Ellipse Selection Tool Options dialog box in the Toolbox.
Finally, cut the centre out of the disk, leaving a ring with the planet appearing in the centre.
Image: Edit → Cut
If the inner part of the ring is too close to the planet, redo these steps with a slightly larger circle.
Finally, remove the ‘marching ants’ marking the elliptical selection.
Image: Select → None
4. Planet and ring system
Now that we have both the planet and its ring system visible, it is time to harmonise them.
4.1 [optional] Colourise

LAYER: Rings
The ring is monochrome or shades of grey. If you wish, colourise it to complement the colour of your planet.
Image: Colours → Colourise
Make sure that the Preview box is checked, then adjust the Hue, Saturation and Lightness to the desired colour. (You can also choose the colour by clicking on the colour box.) Press [OK] when you are finished.
4.2 Scale Layer
See section 3.10 for more details.
LAYER: Rings
At the moment, the rings present a perfect circle around the planet seemingly as viewed from the north or south pole. For an oblique angle, we need to flatten the rings. We can accomplish this most easily by scaling the layer.
Image: Layers → Scale Layer
The dialog box shows the current size of the layer. Make sure that the ‘chain’ to the right of the Width and Height boxes is broken so that the layer will scale unequally in both directions. In this example, I have reduced the Height whilst leaving the Width alone. This compresses the layer into a rectangle that is wider than it is tall. Press [OK] when you are finished.
Don’t panic! If you get the scaling wrong, you can undo it and try again. It may take several attempts before you get the size to your liking.
See section 6.1 for more ideas on flattening the ring.
4.3 Layer transform
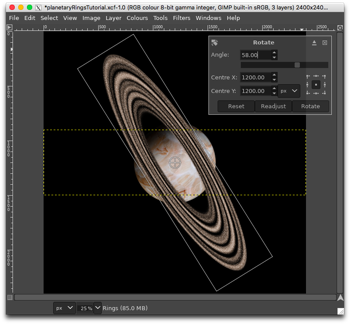
LAYER: Rings
Our ring is horizontal relative to the planet but it is possible to rotate it to a different angle.
Images: Layers → Transform → Arbitrary Rotation
Enter the desired angle and press [ROTATE] when you are ready.
4.4 [optional] Colour to Alpha
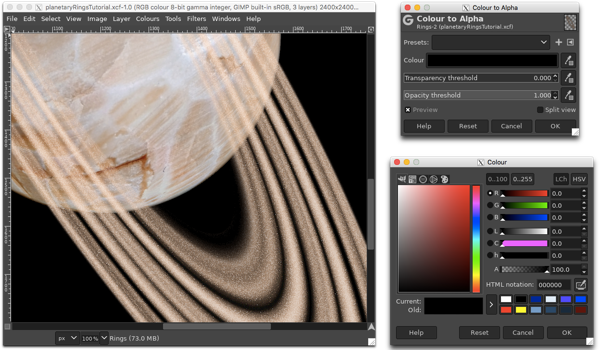
LAYER: Rings
What do the dark rings represent, darker ring material or gaps in the rings? If they are meant to be gaps, then we need to make the blackest parts transparent.
Image: Colours → Colour to Alpha
First, make sure that the Preview box is checked. In the colour bar, choose black or any shade of grey and press [OK]. (The HTML notation for any shade of grey is xxxxxx where x is 0 through 9, plus letters a through f. If x = 0, then you get black. If x = f, then you get white.) This will affect the brightness of your rings so experiment. Press [OK] a second time when you are ready to proceed.
4.5 [optional] Opacity
LAYER: Rings
If you wish your rings to look more transparent, adjust the Opacity in the Layers window.
4.6 Ellipse Selection / Eraser
LAYER: Rings
At the moment, our ring is completely in front of our planet. We need to erase the parts of the rings that are meant to be behind the planet. You can do this freehand with the eraser or you can make a circular selection exactly the same size of the planet first. It may be a good idea to turn off the Feather attribute in the Tool Options dialog box so that you get a nice sharp selection.
Toolbox: Ellipse Selection
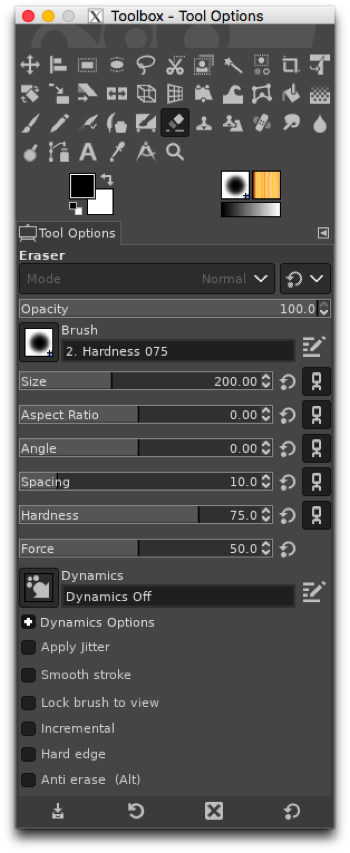
You may wish to increase the brush size of the eraser in the Tool Options dialog box. Carefully erase the portion of the rings inside the ellipse that should be hidden by the disk of the planet.
Toolbox: Eraser
Depending on the way your planet is lit and how the rings are situated, the planet may be casting a shadow on the rings. If this is the case, then we need to add a bit of shadow to the rings in the appropriate place. To do this, first invert your elliptical selection.
Image: Select → Invert
Depending on how good your selection fits your planet, you may need to grow the selection by a pixel or two to avoid leaving a bright streak next to the limb of the planet.
Image: Select → Grow
Then increase the brush size of the eraser so that it is at least as wide as the rings. In the Tool Options dialog box, reduce the Opacity to 95.0. Carefully erase the shadowed part of the ring with smooth brush strokes.
Remove the ‘marching ants’ around our selection.
Image: Select → None
NOTE: You may need to retry this step a few times until you get the ellipse and eraser selections exactly right. I certainly did!
See section 6.2 for adding other shadow effects.
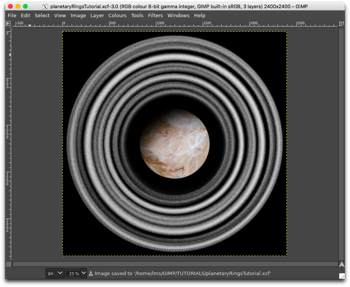
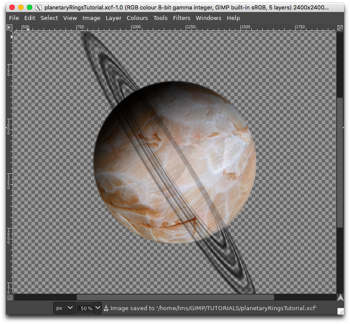
4.7 Result
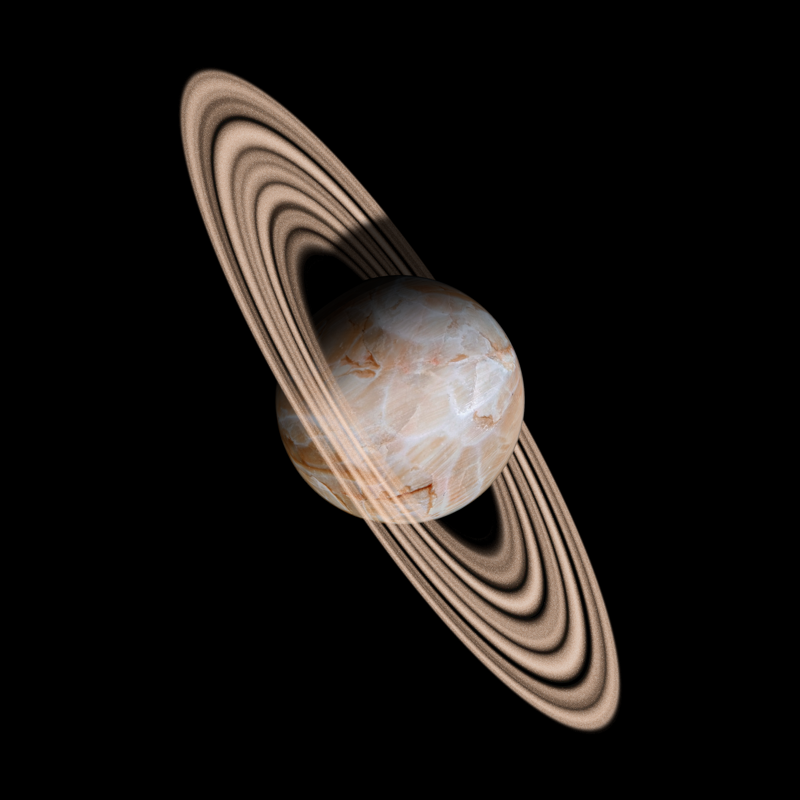
5. Ringed planet in space
It is time to place our ringed planet in the outer space background that we created in step 1.
5.1 Scale Image
Ringed Planet Image: Image: Image → Scale Image
We have created our planet and ring system at a much larger scale that our outer space background so we need to scale our image to an appropriate size. In this example, I have used 450 pixels by 450 pixels. Press [SCALE] when you are finished.
5.2 Copy
In the Layers window, click on the ‘eye symbol’ next to the Background layer. Your ringed planet should now appear above a grey-and-white-chequered background which is how GIMP denotes transparency. Make a copy of this image.
Ringed Planet Image: Image: Edit → Copy Visible
5.3 Paste
We return to our space background image. Paste the GIMP Clipboard (which holds the ringed planet image) into the image.
Starry Background Image: Image: Edit → Paste
Starry Background Image: Image: Layers → To New Layer
Feel free to rename the ‘Pasted Layer’!
5.4 Final positioning
Starry Background Image: LAYER: Pasted Layer
Use the Move tool in the Toolbox window to place the planet in its final position. You may also wish to rotate the layer.
Starry Background Image: Image: Layers → Transform → Arbitrary Rotation
5.5 Layer to Image Size
Starry Background Image: LAYER: Pasted Layer
If the size of the Pasted Layer differs from the size of the image, you can change it.
Image: Layer → Layer to Image Size
5.6 Result
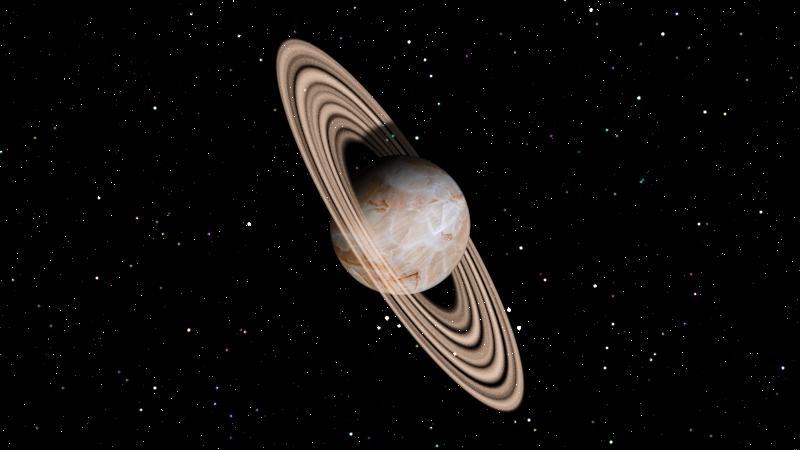
6. Fine tuning
There are a couple of steps we can take to make our image even more realistic.
6.1 Perspective transform
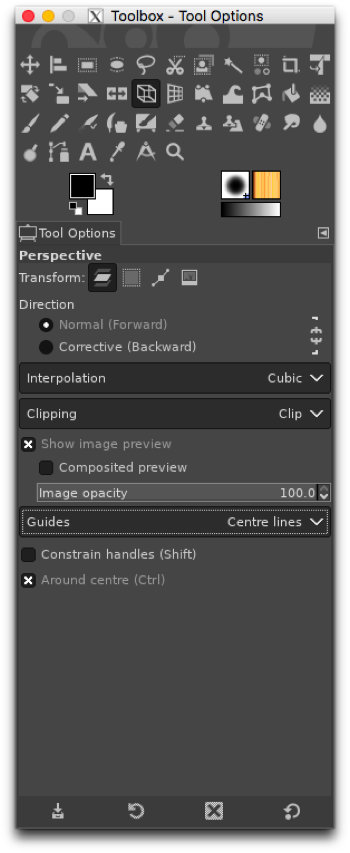
LAYER: Rings
In section 4.2, we scale the Rings layer in order to flatten it. Another way to accomplish this is to use the Perspective transform, either instead of or in addition to scaling the layer. In this example, I have scaled the Rings layer first, then fine-tuned the image with the Perspective transform.
Image: Layers → Scale Layer
Image: Tools → Transform Tools → Perspective

(The Perspective transform tool is also available in the Toolbox window.) The Perspective transform tool is controlled by the four handles at each corner. There are also a number of options in the Tool Options dialog box. You may find it useful to have some kind of Guides turned on. Also, since we want the ring to remain centred on the planet, check the Around centre box. Press [TRANSFORM] when you are finished adjusting the rings. You may need to zoom the image out in order to manipulate the transform.
Personally, I find the Perspective transform tool somewhat fiddly to use but it does give a good result if you are patient (and have excellent fine motor skills!).
6.2 Ring shadows
LAYER: Rings
Strictly speaking, the rings will cast a shadow on the face of the planet. We can add a shadow by making a monochrome copy of the rings, scaling them down, and carefully erasing the unwanted portions. These steps take place just before section 4.5 where we begin erasing unwanted portions of the rings.
6.2.1 Duplicate Layer
See section 3.4 for more details.
LAYER: Rings
Make a copy of the rings.
Image: Layers → Duplicate Layer
Rename the duplicate layer ‘Rings Shadows’.
6.2.2 Desaturate
See section 3.3 for more details.
LAYER: Rings Shadows
We remove the colour by desaturating the ring.
Image: Colours → Desaturate → Desaturate
Our ring is now shades of white and grey.
6.2.3 Invert
LAYER: Rings Shadows
Invert the colours. The lighter the colour, the darker the inversion.
Image: Colours → Invert
6.2.4 Colour correction
LAYER: Rings Shadows
The grey colours of the rings can be darkened if necessary. This can be done using the Levels (see section 3.13 for more details) or Threshold options in the Colours menu.
Image: Colours → Levels
Image: Colours → Threshold
Adjust them to suit.
6.2.5 Scale Layer
See section 3.10 for more details.
LAYER: Rings Shadows
Now we scale this layer so that is closely fits the planet.
Image: Layer → Scale Layer
In this example, I have chosen the size 1600 pixels by 1600 pixels. (The image shows only the planet and the shadows of the rings. The Rings and Background layers are temporarily invisible.) Depending on where the light source is meant to be, it may be necessary to Move the layer to place the shadows of the rings in the correct place on the planet’s surface. In this example, the rings are meant to be almost edge-on to the light source.
6.2.6 Ellipse Selection / Eraser
LAYER: Rings
LAYER: Rings Shadows
At this point, return to section 4.6 to erase the unwanted portions of the rings and shadow.
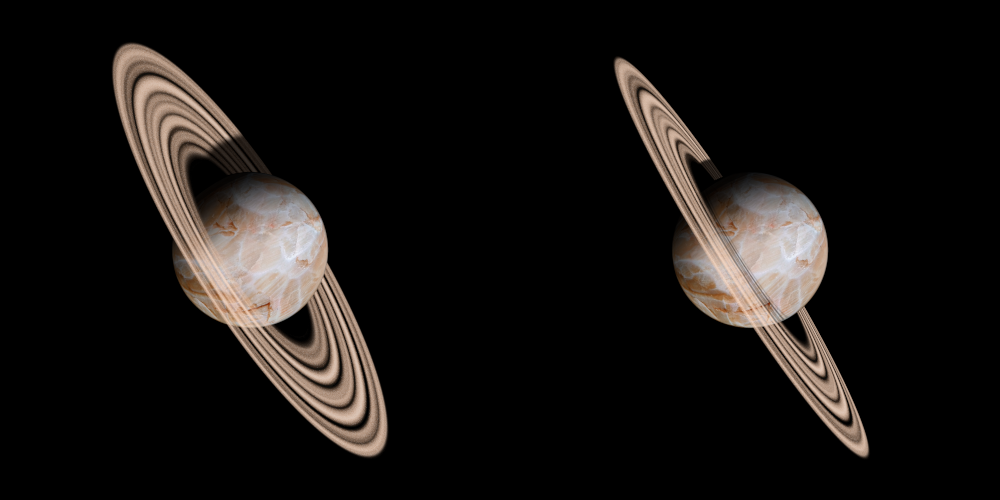
6.3 Comparison